Deconstructing KeyValuePair
.NET’s IDictionary<TKey, TValue> implements IEnumerable<KeyValuePair<TKey, TValue>>, so in C# you may find yourself writing something like this:
foreach (KeyValuePair<int, string> kvp in dictionary)
{
    int key = kvp.Key;
    string value = kvp.Value;

    ... do something with the key and value ...
}
This isn’t horrible, but those two lines of boilerplate at the start of the loop are bit annoying, as is the alternative of writing kvp.Key or kvp.Value every time. Having used languages that don’t make you do this, I now find this surprisingly irritating when returning to C#.
Fortunately, with version 7.0, C# became one of those languages that don’t need this boilerplate. You can now write this:
foreach ((int key, string value) in dictionary)
{
    ... do something with the key and value ...
}
Except this doesn’t always work.
It works if you create a new .NET Core 2.0 application in Visual Studio 2017 update 6 (the latest versions available as I write this). However, if you attempt this with a .NET 4.7.1 application (the latest version of the full .NET Framework as I write this) you will get the following errors:
error CS1061: 'KeyValuePair<int, string>' does not contain a definition for 'Deconstruct' and no extension method 'Deconstruct' accepting a first argument of type 'KeyValuePair<int, string>' could be found (are you missing a using directive or an assembly reference?)
error CS8129: No suitable Deconstruct instance or extension method was found for type 'KeyValuePair<int, string>', with 2 out parameters and a void return type.
In fact, you’ll see this problem with any of these targets:
- Any full (‘desktop’) .NET Framework
- Any version of .NET Standard (including 2.0, the latest version as I write this)
- Older versions of .NET Core (1.1 or 1.0)
Deconstruction is certainly available on these platforms—it is a language feature and as such it doesn’t require special runtime support. (Most recent C# features don’t, although some depend on library features. For example, if you use C#’s newish tuple features, you will need access to the ValueTuple types. These are built into the latest framework class libraries, but if you’re running on older versions you can pick them up with an additional NuGet reference.) Deconstruction won’t work for KeyValuePair<,> by default with any of the frameworks listed because right now, the necessary Deconstruct method has only been shipped with .NET Core 2.0.
We can demonstrate that the deconstruction language feature works in some cases on .NET 4.7.1 by mapping the dictionary into a tuple first, and you can deconstruct that just fine:
// Don't actually do this
foreach ((int key, string value) in dictionary.Select(kvp => (kvp.Key, kvp.Value)))
{
    ... do something with the key and value ...
}
Don’t do this in real code, though, because it’s unnecessarily inefficient—you’re projecting the dictionary’s enumeration of its contents through a LINQ Select, just to be able to take advantage of a language feature.
The right way to fix this is to solve the problem that the C# compiler has helpfully described in the error messages. It needs a suitable Deconstruct method. In the framework class library available to .NET Core 2.0 applications, this is built into the KeyValuePair<,> type, but for older versions, we can write an extension method:
static class KvpExtensions
{
    public static void Deconstruct<TKey, TValue>(
        this KeyValuePair<TKey, TValue> kvp,
        out TKey key,
        out TValue value)
    {
        key = kvp.Key;
        value = kvp.Value;
    }
}
With that in place, the first code example now works perfectly well for any version of .NET Core or .NET Standard, and for versions of the full .NET Framework all the way back to 3.0 (and you can even get it working on .NET 2.0 if you jump through the hoop described at https://stackoverflow.com/a/1522611/497397 to enable the use of extension methods on that version).
If you define the extension method’s class in the System.Collections.Generic namespace, then any source file that has a using directive for that namespace will be source code compatible across .NET Core 2.0 and other flavours of .NET. It’s not possible to achieve full compatibility, because there are situations where you can obtain and use a KeyValuePair<,> without explicitly using that namespace. (A method could return one directly, or indirectly in the form of an IDictionary<,>. If you’re in the habit of using var whenever possible, you might well not have such a using directive.) So we can’t perfectly replicate what’s available in .NET Core 2.0, but we can get reasonably close.
So, problem solved, right?
Slightly Unsatisfactory
The solution just shown works, but there are a couple of things I don’t like about it.
First, where exactly do I define this extension method? I could copy it into every project I write, but that feels irksome. So I might be tempted to move it into a private library so I can define this once and then use it across multiple projects. Or I might get more ambitious and create a NuGet package. But what if someone else does the same? There’s a risk of ending up with multiple conflicting implementations of this extension method as a result of indirect NuGet dependencies. Ideally Microsoft would define The One True NuGet package that does this, but apparently they haven’t.
Second, it somehow feels wrong that if I write a .NET Standard library, there’s no way to use the built-in Deconstruct method when it is available. I want to be able to use deconstruction, and have it bind to the ‘real’ version when running on .NET Core 2.0 or later, falling back to a substitute otherwise. I’d also like to believe that one day the proper implementation in .NET Core 2.0 will be ported back to the full .NET Framework (although it doesn’t appear to be coming in .NET 4.7.2) and I’d like my hypothetical .NET Standard library to pick that up too if that eventually happens. But I don’t believe it’s technically possible to write a .NET Standard library that automatically uses the preferred method when available but the fall-back otherwise. You’d need more than type forwarding: you’d need some way for an assembly to be able to define a static method in a way that forwards to a method on some completely different type. (It can do that by simply calling the method of course, but that’s not quite the same as type forwarding, where the runtime knows that a specific thing the code refers to should be replaced with a different thing at JIT compilation time.)
The first issue means I wouldn’t strive for almost-source-compatibility as described in the preceding section. In practice I’d put the class in a distinctive namespace to avoid conflicts in the case where someone else has had the same idea. And as for the second issue, well, it’s really not that big a deal. The cost of not using the ‘proper’ method is that you might cause the runtime to load one extra type that it didn’t strictly need to—not ideal but not exactly a big deal either. I don’t like it, but I’m going to have to live with it (as the German chancellor didn’t say).
Incremental Loading for Grouped Lists
This is the fifth article in my series exploring some of the technical challenges I encountered while writing my Agenda View Windows Phone app. This is the final entry about grouped data in the ListView control, but there will be more on other aspects of the app.
As with most of this series, the techniques here are not limited to phone apps. They will work in Windows Store apps of any kind—Windows Phone, ordinary Windows, or Universal.
My app presents appointments in the user’s calendar as a scrolling list, and this list could be extremely long—if you want to, you can scroll years into your future appointments, if your diary is populated that far. This sort of ‘infinite scroll’ is popular in mobile apps, so it’s not surprising that the ListView control has support for exactly this sort of usage, enabling you to fetch data gradually, rather than attempting to load it all up front.
If a data source implements both ISupportIncrementalLoading, and INotifyCollectionChanged, the ListView will use the source’s HasMoreItems property to discover whether there is more as-yet-unfetched data, and if so, it will call LoadMoreItemsAsync to ask the source to fetch it. It only uses these members when the user scrolls, meaning that you only load data when it is needed. The source raises collection change notifications in the usual way to indicate when it has fetched new data.
Unfortunately, this doesn’t work if you use the grouping features of ListView. It will simply ignore a source’s ISupportIncrementalLoading implementation when operating in grouped mode. Now as you saw in the previous blog, my app doesn’t actually use grouping—in the end I found it necessary to flatten the data completely to avoid some problems. However, I am hoping that the problem in question is in fact a bug in the ListView, and that one day I’ll be able to go back to using grouped data (because it would bring back the sticky headers), and in any case, I had already solved the incremental loading problem before I discovered that I wasn’t going to be able to use the ListView in grouped mode.
Roll Your Own Incremental Loading
Fortunately, it’s not particularly hard to implement incremental loading yourself. The basic requirement is to discover when items scroll into view. You can use this information to ensure that you always have at least some minimum number of data items ahead of that point pre-loaded, ready to scroll into view. If the number of loaded-but-not-yet-seen items drops below some threshold, you load some more.
So how do you discover when an item has scrolled into view? I use an extremely low-tech approach: I wait for data binding to read one of the bound properties of a view model. Here is a slightly simplified version of one of the view models from my app:
public class AgendaDayGroupViewModel : ObservableCollection<ListItemViewModel>
{
    private readonly string _dayText;
    private Action<AgendaDayGroupViewModel> _onFirstView;

    public AgendaDayGroupViewModel(
        DateTime date, Action<AgendaDayGroupViewModel> onFirstView)
    {
        Date = date;
        _onFirstView = onFirstView;

        _dayText = date == DateTime.Now.Date
            ? TimeAndDateStrings.TodayGroupHeading
            : date.ToString("D").ToUpperInvariant();
    }

    public DateTime Date { get; private set; }

    public string DayText
    {
        get
        {
            Action<AgendaDayGroupViewModel> cb = _onFirstView;
            if (cb != null)
            {
                _onFirstView = null;
                cb(this);
            }

            return _dayText;
        }
    }
}
I’ve removed the parts that aren’t directly relevant to the example, but the code that handles incremental loading is exactly what the real app uses.
This is a view model representing a group—you can see that it derives from a collection class, so it has a collection of items as well as having its own properties. Back when I had flattened my view models to a single level of grouping, but before I flattened it completely, I had this structure:
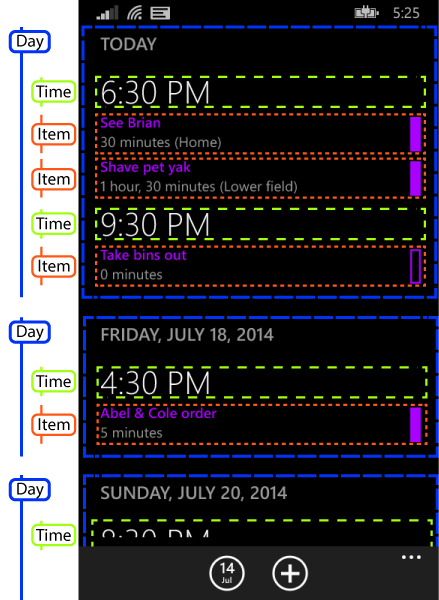
The code above represents the items labelled as ‘Day’ in that figure—so it’s a group of all the appointments in a particular day. The DayText property shows the heading, e.g. “TODAY” or “FRIDAY, JULY 18, 2014”. (And even though I now flatten my source entirely, I do that with a wrapper as you saw last time. So this day group class still exists, even though the ListView doesn’t work with the grouped structure directly.)
Anyway, the important code is inside the DayText property’s get accessor. The very first time this property is read, it invokes the callback that was passed when the view model was constructed. And here’s the code that gets called:
public void OnDayGroupViewed(AgendaDayGroupViewModel groupJustViewed)
{
    int position = DayGroupViewModels.IndexOf(groupJustViewed);

    int targetPosition = position + 10;
    int indexToFetchBeyond = Math.Min(
        targetPosition, DayGroupViewModels.Count - 1);
    AgendaDayGroupViewModel groupVmToFetchBeyond =
        DayGroupViewModels[indexToFetchBeyond];

    int undershoot = targetPosition - indexToFetchBeyond;
    _ensureDataAvailableAfterRequests.OnNext(
        groupVmToFetchBeyond.Date.AddDays(undershoot));
}
The rough idea here is to ensure that if we haven’t already, we start fetching data for a couple of screens ahead of where we are now. (You can see that it looks 10 items ahead. That happens to correspond roughly to two screens of data in my app.) However, things get a little messy because the API I’m using to fetch calendar data requires me to work out the date. So I need to get an approximation to the date that will be about two screens of data ahead. This obviously varies according to how many appointments you have, so we work it out as far as we can from the data we already have (e.g., perhaps we have enough data to know the date that is 5 items ahead) and then just bump the date by one day per item. (And this is just a “must have data at least this far ahead” date; the code that fetches the data then goes on to read ahead by another 20 items beyond that point, so we’ll have another four screens of data beyond whatever date we end up picking. So it doesn’t greatly matter in practice that this part is a little bit approximate.)
The final line of that code above calls the OnNext method of a Subject<DateTime>, which is an observable source of notifications. (This is part of the Reactive Extensions framework.) A separate piece of code observes these notifications, compares it with the date of the latest data to have been fetched, and also with any fetch currently in progress, and works out whether it needs to fetch any more batches of data.
And that’s pretty much it. To summarize, our group view model invokes a callback when one of its properties is read for the first time, which turns out to be a reliable indicator of when XAML has just instantiated a header template representing the group and has processed the data bindings in that template. This in turn is a reasonably reliable indicator that the group is about to come into view. We then work out what date will be approximately two screens ahead of that, and ensure that if we don’t already have data at least that far ahead (or we aren’t in the process of fetching data that will cover that range) that we begin to fetch it.
There is one additional complication: the application periodically reloads all appointments to check whether anything has changed since last time. If such a refresh is in progress at the point at which we decide we need to fetch more data, that extra fetch just gets tagged on to the end of the refresh process.
Most of the time this ensures that appointment data is available before the relevant part of the list scrolls into view. However, if you scroll fast enough, you can get ahead of the data fetching. And also, the initial fetch can be a little sluggish. (Both issues are much worse on slower phones. On the Lumia 930 I use as my main phone, the calendar APIs supply data almost immediately, but on the Lumia 620 I use for development and testing, it can take well over a second for the calendar API to return even a batch of just 20 appointments.) So we need to handle the case where we don’t yet have the appointments for the current scroll position.
Indicating Progress
You may have missed it, but I’ve already shown how I handle progress indications for data that we’re fetching but which is not yet available. In my previous entry, I showed the code that flattens my grouped data into a linear collection. The FlatteningObservableCollection class I showed includes an EndPlaceholder property. Whatever you put in there will appear as the final item in the flattened list. (So even if the underlying data source is completely empty, as it will be when the app first runs, and has not yet received any calendar data, the flattened collection will still contain one item—this end placeholder.)
When we have not yet hit the end of the user’s calendar, this end placeholder is a distinct view model type called LoadingDataItemViewModel. And if the calendar API tells us that the user has no more appointments, we replace it with an instance of another distinct type, NoMoreAppointmentsItemViewModel. (And if we end up discovering that the user’s calendar has grown during of the app’s periodic refreshes, we will once again put the LoadingDataItemViewModel in there while we fetch the additional appointments.)
I then use the template selector technique I showed in the third entry in this series to show dedicated templates for these two types. For the loading one, I show a message and a progress bar. And for the ‘no more’ one, I just show a message indicating that there are no more appointments.
Tweaking Performance
The one final piece of the puzzle was to experiment with a couple of variables that affect performance. One was the batch size in which we fetch data from the calendar API, and the other was the extent to which we try to keep ahead of the user’s current scroll position.
When fetching appointments from the calendar, you tell it how many items you’d like it to return. The time it takes can be described as C+N×P, where C is a constant, N is the number of items, and P is the time per item. Both C and P are surprisingly large. (On my Lumia 620, C seemed to be about 0.8 seconds, and P is something like 0.02 seconds.) This has two important consequences: first, fetching even so much as a single appointment will cause a delay long enough to annoy users; second, the difference between a batch of 20 and 40 appointments is enough to turn a slightly annoying delay into a really annoying delay. (This matters less on high end phones, by the way, because everything’s a lot faster on those.)
This results in a trade-off: smaller batches improve initial responsiveness, and will also reduce the delay in the case where the user scrolls fast enough to overtake the app, but larger batches will support a higher sustained rate of scrolling.
The decision of how far ahead we read is related to batch size: the further ahead you read, the larger batch size you can get away with because for a given speed of scrolling, you have more time to fetch the next batch before the user catches up with you.
Now it would have been possible to implement a strategy in which we begin with small reads, in order to fill the screen nice and quickly, and then increase the batch size once we’re ahead, to be able to sustain a higher overall scroll rate. However, with some experimentation, I found that it was possible to achieve satisfactory performance even on a low-end phone without resorting to this complexity.
In the end, I found that kicking off reads about two screens ahead of the current position, and fetching 20 appointments at a time produced a reasonably fast initial load, while making it genuinely difficult (although not impossible) to scroll faster than the app could keep up with on my Lumia 620. (Weirdly enough, the two guesses I plucked out of thin air to begin with—keep at least 10 items ahead, and fetch in batches of 20—turned out to be better than the alternatives I tried.)
Conclusion
So there we have it. Discover how far the user has scrolled with the low-tech technique of watching for when data binding reads one of your view model’s properties. Always stay some way ahead of the user’s current position. And experiment with the distance by which you fetch ahead, and the size of the batches you fetch to see what works best for your particular data source’s performance characteristics.
Vertical Jiggle in Grouped ListViews
This is the fourth article in my series exploring some of the technical challenges I encountered while writing my Agenda View Windows Phone app. I initially promised four entries on the topic of showing grouped data in the ListView control, but I’ll be adding one more after this. (There are more to come on other aspects of the app though—I’ve got another six planned.)
Most of the articles in this series are applicable to both Windows and Windows Phone store apps, and the examples available for download in this entry are Universal apps. However, in this article I show how to work around a problem that only occurs on Windows Phone. The code works perfectly well in Universal apps with the workaround in place, but is not actually necessary if you’re only targeting Windows.
As my first blog entry in this series described, my app needs two levels of grouping: appointments are grouped by time, and then by day. That was tricky because the ListView supports just one level of grouping, but in the second and third articles, I showed what appears to be a satisfactory way to handle this: provide the ListView with a single level of grouping (by day) and use different item types to represent time headers and appointments within that. (Likewise, in the address-based example I’ve been using, we provide data grouped by country, and each group contains a mixture of elements representing town headers and addresses.)
However, there are two unresolved problems. First, there’s some occasional horizontal jiggling. That’s not a grouping issue—you can get the same issue with a flat list. As a quick fix for now, I’ll just set fixed widths on all the templates. This makes the problem go away but it’s not an ideal solution; I’ll show how to fix it properly in a later article. The second problem is that the approach I’ve shown so far only works if all your items are the same height. And since the nested group headers are just items as far as the ListView is concerned, this means your nested group headers must be the same height as your items.
To show what happens if the heights differ, I can add the following attribute to the TownGroup header from the final example from last time:
Margin="0,20,0,0"
Here’s a copy of the solution with this change for download. The following two screenshots show the original version, and then the version with the additional vertical margin for the town groups:

This makes it easier to see the group structure at a glance. My real app needs this sort of spacing to reproduce the look of the old app on which it is based.
Unfortunately, if you run this app on a phone, you’ll see a problem if you scroll down a few pages through the list, and then back up again. Although it looks fine when moving forward through the data, as you come back up again the sticky group title at the top of the page jiggles around vertically. (The Windows app doesn’t have this problem, because it doesn’t seem to support the sticky group headers. These only seem to be available for Windows Phone apps.)
This is a different issue from the horizontal jiggling I’ve mentioned before. That looks different, and it doesn’t occur in this particular example because I’ve applied a fixed width to every data template. (It’s superficially similar—both horizontal and vertical jiggle can be eliminated with fixed-size data templates. But the vertical jiggle seems only to occur with grouped data.)
As far as I can tell, this is a limitation of the phone ListView—you cannot use mixed-height items in conjunction with grouping, because you’ll end up with a vertically jiggling sticky group header. And as far as I can tell, you can’t even disable the sticky group header to avoid the problem. If you want mixed item heights in a ListView, you cannot use it in grouped mode. So that’s how I eventually came to the solution I used in my app.
Completely Flattened Groups
Because I want to have mixed item heights, I cannot use even the single-level group support offered by the ListView. So I need to take the same trick I already applied once—flattening the items in the nested groups—and apply it to the top-level groups too. So the structure ends up looking like this:
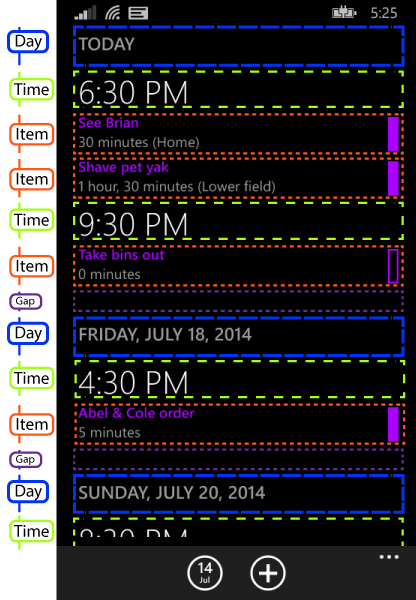
The only difference the end user will see is that the day group headers are no longer sticky—they will scroll out of view immediately, instead of hanging around for as long as at least part of the corresponding group is visible. Everything else looks exactly like it did before. But as far as the ListView is concerned, this is now just one flat list with no grouping.
I’m using the same item template selector as last time, but with more templates: I’ve now defined the day group header in there instead of in a group style, and you’ll also notice that my diagram features one extra item type. I’ve got a ‘Gap’ item between each day group. (The type is actually called EndOfDayGroup in my code, but that would have cluttered my already rather busy diagram.) That’s there to provide a gap between each day group. I couldn’t add it as margin at the top of the day group because that would mean when you first start the app, there’d be a weird gap above the TODAY group. I need the gap after every day group, but not before the first one. And while I could make the day group template’s height vary dynamically according to whether it was the first or not, it was simpler to do this.
(So I was slightly off in an earlier blog when I said I ended up with three item types. You can see four here. And in fact there are two more. I have another item type to represent the “loading data” progress indicator that appears when you’ve down to the end of the data the app has fetched so far, but we’re waiting for more data to come from the appointment API. And there’s yet another one that goes at the end of the list if we actually get to the very end of your appointments. If you have indefinitely recurring appointments, you’ll never see that one.)
Now the obvious way to flatten this data is to use much the same technique as I showed in the earlier entry on flattening nested groups. However, by the time I discovered this jiggling problem, I had already implemented my data source with real outer groups and flattened inner groups. For reasons I’ll describe in a later blog, I have a lot of code to handle updating a single-tier grouped structure, and moving to a flatter one was going to be a lot of work. (And I’m hoping that this jiggling issue is a WinRT bug that will be fixed one day, at which point I’d like to go back to using groups, because the sticky headers are nice.)
So I used a different approach: I wrote my own observable collection that wraps a grouped source (a list of lists) and presents it as a flat list. This collection also automatically adds items to represent the gaps between day groups, and also appends a single item to the end. (That final appended item is either the “loading” one or the one that indicates that there are no more appointments.)
For your entertainment, here’s the entire wrapper:
// ------------------------------------------------------------------------------------- // <copyright file="FlatteningObservableCollection.cs" company="Interact Software Ltd."> // © 2014 Interact Software Ltd. // </copyright> // ------------------------------------------------------------------------------------- namespace AgendaView.Collections { using System; using System.Collections; using System.Collections.Generic; using System.Collections.ObjectModel; using System.Collections.Specialized; using System.Linq; using AgendaView.Extensions; /// <summary> /// Wraps an observable collection of observable collections, and presents the contents /// as a single, flat change-notifying collection that includes not just the nested items, /// but also the groups themselves, end-of-group placeholders, and a final end-of-collection /// placeholder. /// </summary> /// <typeparam name="T">The type of items in the nested containers.</typeparam> /// <typeparam name="TContainer">The container type - must be assignable to /// <see cref="ObservableCollection{T}"/>.</typeparam> /// <typeparam name="TGroupEndPlaceholder">The type of the placeholder to add to the /// end of each group.</typeparam> /// <remarks> /// <para> /// This type does not inherit from <c>ObservableCollection</c> itself. Instead, it implements /// <c>INotifyCollectionChanged</c>, and <c>IList</c>, which is sufficient for XAML to observe /// our change notifications. /// </para> /// <para> /// This type is useful because there are issues with binding to nested data in WinRT XAML. Not /// only does the support for nested data stop at 1 level deep, even that doesn't work properly /// with heterogeneous data (at least, it doesn't as of Windows Phone 8.1) - if the list items have /// varying sizes, something causes the sticky group header at the top of the <c>ListView</c> /// to jiggle up and down when scrolling back up through the list. The only way to present /// variable-height items in a satisfactory way is to present them to the <c>ListView</c> as /// a flat collection. /// </para> /// <para> /// This collection's item type is <c>object</c> because the flattened collection can contain /// items, groups, and placeholders, and there is no common base class for all these types of /// items. (In particular, mixing the groups with the items makes it effectively impossible to /// have a common base, because the groups need to derive from <c>ObservableCollection</c>.) /// </para> /// </remarks> public class FlatteningObservableCollection<T, TContainer, TGroupEndPlaceholder> : IList<object>, INotifyCollectionChanged, IList where TContainer : ObservableCollection<T> where TGroupEndPlaceholder : new() { private readonly ObservableCollection<TContainer> _source; /// <summary> /// Our copy of the list of items. /// </summary> /// <remarks> /// We need this to be able to raise Remove notifications correctly when one of the /// child groups raises a Reset. (Unfortunately, when you get a Reset, all the items /// in the source have already gone, so if you want to know what was missing, you /// need to have maintained a copy.) /// </remarks> private readonly List<List<T>> _copies = new List<List<T>>(); /// <summary> /// Includes items representing groups as well as those representing group members. /// </summary> private readonly List<int> _cumulativeSizeByGroup = new List<int>(); private readonly List<TGroupEndPlaceholder> _endPlaceholders = new List<TGroupEndPlaceholder>(); private T _endPlaceholder; /// <summary> /// Initializes a <see cref="FlatteningObservableCollection{T,TContainer,TGroupEndPlaceholder}"/>. /// </summary> /// <param name="source">The source collection of collections.</param> public FlatteningObservableCollection(ObservableCollection<TContainer> source) { _source = source; _source.CollectionChanged += OnSourceCollectionChanged; AddGroups(_source, 0); } /// <inheritdoc/> public event NotifyCollectionChangedEventHandler CollectionChanged; /// <summary> /// Gets or sets the final object to add to the end of the collection. /// </summary> public T EndPlaceholder { get { return _endPlaceholder; } set { if (!Equals(_endPlaceholder, value)) { var old = _endPlaceholder; _endPlaceholder = value; OnCollectionChanged(new NotifyCollectionChangedEventArgs( NotifyCollectionChangedAction.Replace, value, old, Count - 1)); } } } /// <inheritdoc/> public bool IsFixedSize { get { return false; } } /// <inheritdoc/> public bool IsSynchronized { get { return false; } } /// <inheritdoc/> public object SyncRoot { get { throw new NotImplementedException(); } } /// <inheritdoc/> public int Count { get { int sourceAndGroupItems = _cumulativeSizeByGroup.Count == 0 ? 0 : _cumulativeSizeByGroup[_cumulativeSizeByGroup.Count - 1]; return sourceAndGroupItems + 1; } } /// <inheritdoc/> public bool IsReadOnly { get { return true; } } /// <inheritdoc/> public object this[int index] { get { if (index == Count - 1) { return EndPlaceholder; } if (index == 0) { return _source[0]; } int searchResult = _cumulativeSizeByGroup.BinarySearch(index); if (searchResult < 0) { // Not an exact hit, so this is the index of an item within a // group, not of a group itself. // Search result will be 1's complement of group containing this. int groupIndex = searchResult ^ -1; int countAtStartOfGroup = groupIndex == 0 ? 0 : _cumulativeSizeByGroup[groupIndex - 1]; int indexWithinGroup = index - countAtStartOfGroup - 1; return indexWithinGroup == _source[groupIndex].Count ? (object) _endPlaceholders[groupIndex] : _source[groupIndex][indexWithinGroup]; } return _source[searchResult + 1]; } set { throw new NotImplementedException(); } } /// <inheritdoc/> public IEnumerator<object> GetEnumerator() { int gi = 0; foreach (TContainer container in _source) { yield return container; foreach (var item in container) { yield return item; } yield return _endPlaceholders[gi]; gi += 1; } yield return EndPlaceholder; } /// <inheritdoc/> IEnumerator IEnumerable.GetEnumerator() { return GetEnumerator(); } /// <inheritdoc/> public void Add(object item) { throw new NotImplementedException(); } /// <inheritdoc/> int IList.Add(object value) { throw new NotImplementedException(); } /// <inheritdoc/> public void Clear() { throw new NotImplementedException(); } /// <inheritdoc/> void IList.Remove(object value) { throw new NotImplementedException(); } /// <inheritdoc/> public void RemoveAt(int index) { throw new NotImplementedException(); } /// <inheritdoc/> public bool Contains(object item) { throw new NotImplementedException(); } /// <inheritdoc/> public void CopyTo(object[] array, int arrayIndex) { throw new NotImplementedException(); } /// <inheritdoc/> public bool Remove(object item) { throw new NotImplementedException(); } /// <inheritdoc/> public void CopyTo(Array array, int index) { throw new NotImplementedException(); } /// <inheritdoc/> public int IndexOf(object item) { var thisEnum = this.AsEnumerable(); var c = thisEnum.Count(x => !ReferenceEquals(x, item)); return c == Count ? -1 : c; } /// <inheritdoc/> public void Insert(int index, object item) { throw new NotImplementedException(); } private void AddGroups(IEnumerable<TContainer> groups, int insertionIndex) { int i = insertionIndex; int previousIndex = insertionIndex - 1; int totalToHere = previousIndex < 0 || previousIndex >= _cumulativeSizeByGroup.Count ? 0 : _cumulativeSizeByGroup[previousIndex]; int totalAdded = 0; foreach (TContainer container in groups) { int toAdd = container.Count + 2; totalToHere += toAdd; totalAdded += toAdd; _cumulativeSizeByGroup.Insert(i, totalToHere); _copies.Insert(i, container.ToCopyList()); _endPlaceholders.Add(new TGroupEndPlaceholder()); i += 1; container.CollectionChanged += OnContainerInSourceChanged; } while (i < _cumulativeSizeByGroup.Count) { _cumulativeSizeByGroup[i] += totalAdded; i += 1; } } private void RemoveGroups(IEnumerable<TContainer> groups, int removalIndex) { int totalRemoved = 0; int groupCount = 0; foreach (TContainer container in groups) { totalRemoved += container.Count + 2; groupCount += 1; container.CollectionChanged -= OnContainerInSourceChanged; } _cumulativeSizeByGroup.RemoveRange(removalIndex, groupCount); _copies.RemoveRange(removalIndex, groupCount); _endPlaceholders.RemoveRange(removalIndex, groupCount); for (int i = removalIndex; i < _cumulativeSizeByGroup.Count; ++i) { _cumulativeSizeByGroup[i] -= totalRemoved; } } private void ReplaceGroups( IEnumerable<TContainer> oldGroups, IEnumerable<TContainer> newGroups, int index) { int totalChange = 0; int i = index; foreach (var pair in oldGroups.Zip( newGroups, (oldContainer, newContainer) => new { oldContainer, newContainer })) { totalChange += pair.newContainer.Count - pair.oldContainer.Count; _cumulativeSizeByGroup[i] += totalChange; _copies[i] = pair.newContainer.ToCopyList(); _endPlaceholders[i] = new TGroupEndPlaceholder(); i += 1; pair.oldContainer.CollectionChanged -= OnContainerInSourceChanged; pair.newContainer.CollectionChanged += OnContainerInSourceChanged; } while (i < _cumulativeSizeByGroup.Count) { _cumulativeSizeByGroup[i] += totalChange; i += 1; } } private void OnContainerInSourceChanged(object sender, NotifyCollectionChangedEventArgs e) { var container = (TContainer) sender; int gi = _source.IndexOf(container); int baseIndex = gi == 0 ? 0 : _cumulativeSizeByGroup[gi - 1]; switch (e.Action) { case NotifyCollectionChangedAction.Add: _copies[gi].InsertRange(e.NewStartingIndex, e.NewItems.Cast<T>()); for (int i = gi; i < _cumulativeSizeByGroup.Count; ++i) { _cumulativeSizeByGroup[i] += e.NewItems.Count; } OnCollectionChanged(new NotifyCollectionChangedEventArgs( NotifyCollectionChangedAction.Add, e.NewItems, baseIndex + e.NewStartingIndex + 1)); break; case NotifyCollectionChangedAction.Remove: _copies[gi].RemoveRange(e.OldStartingIndex, e.OldItems.Count); for (int i = gi; i < _cumulativeSizeByGroup.Count; ++i) { _cumulativeSizeByGroup[i] -= e.OldItems.Count; } OnCollectionChanged(new NotifyCollectionChangedEventArgs( NotifyCollectionChangedAction.Remove, e.OldItems, baseIndex + e.OldStartingIndex + 1)); break; case NotifyCollectionChangedAction.Replace: for (int i = 0; i < e.NewItems.Count; ++i) { _copies[gi][i + e.NewStartingIndex] = (T) e.NewItems[i]; } OnCollectionChanged(new NotifyCollectionChangedEventArgs( NotifyCollectionChangedAction.Replace, e.NewItems, e.OldItems, baseIndex + e.NewStartingIndex + 1)); break; case NotifyCollectionChangedAction.Reset: var itemsRemoved = _copies[gi]; _copies[gi] = new List<T>(); for (int i = gi; i < _cumulativeSizeByGroup.Count; ++i) { _cumulativeSizeByGroup[i] -= itemsRemoved.Count; } OnCollectionChanged(new NotifyCollectionChangedEventArgs( NotifyCollectionChangedAction.Remove, itemsRemoved, baseIndex + 1)); break; case NotifyCollectionChangedAction.Move: throw new NotImplementedException(); default: throw new ArgumentOutOfRangeException(); } } private IList GroupsAndItemsFromGroups(IList groups, int startGroupIndex) { return groups .Cast<TContainer>() .SelectMany((g, i) => new object[] { g } .Concat(g.Cast<object>()) .Concat(new object[] { _endPlaceholders[startGroupIndex + i] })) .ToList(); } private void OnSourceCollectionChanged(object sender, NotifyCollectionChangedEventArgs e) { IList itemsRemoved; switch (e.Action) { case NotifyCollectionChangedAction.Add: // Apparently ListView does not cope well with multi-item change notifications, // so we need to do one at a time. for (int i = 0; i < e.NewItems.Count; ++i) { var container = (TContainer) e.NewItems[i]; // Originally, we added all the groups at once, but we now have // to do them one at a time to make sure the collection state is // consistent with the changes advertised so far. // In fact this is a bit smelly (as is the Remove code) because // AddGroups causes multiple items to become visible externally // at once, so the collection gets slightly ahead of the events. // (But not by as much as if we added all the groups at once). AddGroups(new[] { container }, e.NewStartingIndex + i); int idx = (e.NewStartingIndex + i) == 0 ? 0 : _cumulativeSizeByGroup[e.NewStartingIndex + i - 1]; OnCollectionChanged(new NotifyCollectionChangedEventArgs( NotifyCollectionChangedAction.Add, new[] { container }, idx)); for (int j = 0; j < container.Count; ++j) { OnCollectionChanged(new NotifyCollectionChangedEventArgs( NotifyCollectionChangedAction.Add, new[] { container[j] }, idx + 1 + j)); } OnCollectionChanged(new NotifyCollectionChangedEventArgs( NotifyCollectionChangedAction.Add, _endPlaceholders[e.NewStartingIndex], idx + 1 + container.Count)); } break; case NotifyCollectionChangedAction.Remove: // Apparently ListView does not cope well with multi-item change notifications, // so we need to do one at a time. foreach (TContainer container in e.OldItems) { var containerInCollection = new[] { container }; itemsRemoved = GroupsAndItemsFromGroups(containerInCollection, e.OldStartingIndex); RemoveGroups(containerInCollection, e.OldStartingIndex); int idx = e.OldStartingIndex == 0 ? 0 : _cumulativeSizeByGroup[e.OldStartingIndex - 1]; foreach (object item in itemsRemoved) { OnCollectionChanged(new NotifyCollectionChangedEventArgs( NotifyCollectionChangedAction.Remove, item, idx)); } } break; case NotifyCollectionChangedAction.Replace: itemsRemoved = GroupsAndItemsFromGroups(e.OldItems, e.OldStartingIndex); ReplaceGroups( e.OldItems.Cast<TContainer>(), e.NewItems.Cast<TContainer>(), e.OldStartingIndex); OnCollectionChanged(new NotifyCollectionChangedEventArgs( NotifyCollectionChangedAction.Replace, GroupsAndItemsFromGroups(e.NewItems, e.NewStartingIndex), itemsRemoved, e.OldStartingIndex == 0 ? 0 : _cumulativeSizeByGroup[e.OldStartingIndex - 1])); break; case NotifyCollectionChangedAction.Reset: _cumulativeSizeByGroup.Clear(); _copies.Clear(); OnCollectionChanged(new NotifyCollectionChangedEventArgs(NotifyCollectionChangedAction.Reset)); break; case NotifyCollectionChangedAction.Move: throw new NotImplementedException(); default: throw new ArgumentOutOfRangeException(); } } private void OnCollectionChanged(NotifyCollectionChangedEventArgs e) { if (CollectionChanged != null) { CollectionChanged(this, e); } } } }
You initialize this with an ObservableCollection<TContainer>, where TContainer is top level group type. (In my address-based examples from earlier blogs, that would be CountryGroup.) This group type must inherit from ObservableCollection<T>. The flattened list example I showed in an earlier blog had T as object, because each country group contains a mixture of town header and address items. In my real app, T is a base class common to the view models for all of the things that end up in the flattened list.
Custom Collection Change Notification Implementation
Since my app needs to be able to update the list (e.g., when the user adds or removes an appointment), I need to support list change notifications—that’s why I require the incoming groups to derive from ObservableCollection<T>. But my wrapper does not. Instead, it implements INotifyCollectionChanged directly.
When you write a custom INotifyCollectionChanged implementation for a store app, it must also provide IList. (I also chose to implement IList<object> for my own convenience, but XAML data binding doesn’t care about that.) If you don’t supply a non-generic IList implementation, your INotifyCollectionChanged will be ignored.
An alternative way to implement this would be to maintain an independent ObservableCollection<T> that is essentially a flattened copy of the underlying collections, and to write code to keep it in sync. But I chose to make it a wrapper—if you look at the implementation for the indexer and other collection members, you’ll see it ultimately retrieves data from the underlying collections. My reason was twofold: first, some phones have very limited memory, and unnecessary duplication is wasteful (although in practice, it’s just references we’re duplicating, and there aren’t that many of them); second, the support for batched change notifications in INotifyCollectionChanged enables a flattening wrapper to report changes in the underlying data more efficiently than would be possible when maintaining a flattened copy.
However, I may change that in the future, because there’s a frustrating problem.
Store Apps Don’t Like Batch Change Notifications
It turns out that there is a limitation in store app data binding: it doesn’t seem to support data sources that provide batch change notifications. This means my wrapper cannot ensure that the collection state visible through the indexer is always consistent with the state implied by change notification events. The problem is that certain changes in the source data require me to report multiple changes. For example, if an entire group is removed from the source, I need to report the removal of every item in that group (because my flattening wrapper presents each group as a flattened version of its contents).
In theory, the most efficient way to do this is to provide a batch change notification—the INotifyCollectionChanged interface is designed to accommodate this very scenario. Unfortunately, batch change events seem to confuse the ListView hopelessly. In practice, it only works if you raise changes one item at a time. So when a group vanishes, I have to generate multiple change notifications.
This creates a problem. By the time the source notifies me of a group’s removal, the underlying data has already gone. And since my wrapper effectively presents just a view over the underlying data, this means that by the time I raise the first removal notification, the entire group’s contents are no longer available. That’s not really supposed to happen—it means that if any code happens to look inside the collection before I’ve finished raising change notifications, it’ll be confused. (E.g., suppose the first group vanishes, and that it had been flattened to 10 items. Directly after that happens, the item previously visible at offset 11 is now at offset 1, but at the point at which I’ve raised only a single notification, you’d expect it to be at offset 10.) With batch notifications it’s not a problem because you can raise a single event saying “these 10 items just vanished”. But if you can’t do that, you end up raising an event that says “this one item just vanished” even though another 9 have also already vanished.
As it happens, in my app items usually come and go one at a time anyway, and in practice, groups are empty by the time they are removed, so this isn’t a problem. However, it makes me uncomfortable—this is a non-obvious invariant the rest of the system has to maintain, so it could easily be a cause of bugs in future. So at some point I might avoid this problem by maintaining a separate ObservableCollection<T>, and updating that as the source data changes. When a group goes from the source, I’d have to remove the items from the copy one at a time, causing the multiple change notifications that the ListView seems to need, but this time, the collection it sees would remain consistent with the events, because I’d be updating the collection itself one element at a time.
Conclusion
With this collection flattener, I was able to take my single-level partially-flattened group model and present it to the ListView as a completely flat model. (With hindsight, I could perhaps have used two of these flattening wrappers, meaning my underlying data source could have used a fully nested group structure that directly corresponds to the logical structure the user sees. But as is so often the case with software, the route you would take with the benefit of hindsight may be quite different to the route you take when you’re learning about the obstacles as you go.) Used in conjunction with the template selector from last time, this enables me to create the look that I need, and by letting the ListView think that this is not a grouped data source, I avoid the vertical jiggling problems that occur with mixed item heights in a grouped list.
Mixed ListView Item Templates for Store Apps
This is the third article in a series describing how to solve a variety of problems I encountered while writing a real store app.
Although the app in question (Agenda View) is a phone app, everything in this article (and almost everything in the series) also applies to Universal apps and Windows store apps. In fact, I’ve built all the examples in this entry as Universal apps so that you can try them out either as Windows or Windows Phone apps.
Last time, I showed how to present groups nested within groups despite the fact that ListView supports only a single level of grouping. The trick was to use a mixture of item types, with a distinct type for items representing list headers. Each day group is a collection containing these header items interleaved with the actual appointment items, as illustrated by this annotated screenshot:
The challenge at the end of the previous article was how to display the different item types in different ways. In my simple example, both kinds of items displayed a single string, and I added some properties to my source objects to modify aspects of the appearance. This technique would not work easily in my app—as you can see from that screenshot, time headers have a completely different appearance from appointments.
What I really want is to be able to express the appearance completely in XAML. Microsoft’s other XAML frameworks have a built in solution to this: you can associate data templates with types, meaning that list controls will automatically pick item templates based on the item type. (WPF has always had this. Silverlight was rather late to the party—it took five versions, but we got it eventually.) Unfortunately, XAML store apps (for either Windows or phone) cannot do this. This is presumably partly down to the fact that WinRT is not based on .NET, so there isn’t a single definition of what constitutes a ‘type’ in XAML for store apps.
You need to roll your own solution. I came up with a few possible techniques for doing this. I’ll describe them all, finishing with the one I eventually used in my app.
Binding to Visibility Properties
My app only has two kinds of items in a day group: time group headings and appointments. (Actually, as you’ll see later, my real app eventually ended up with three. But the point is that it’s a small number.) So one way of enabling different visuals for different item types is to define properties of type Visibility on your source objects.
For example, in the address-based example I’m using in this series, I could modify the TownGroup to look like this:
public class TownGroup
{
    public string Town { get; set; }

    public Visibility ItemVisibility { get { return Visibility.Collapsed; } }
    public Visibility GroupHeaderVisibility { get { return Visibility.Visible; } }
}
I can add a similar pair of properties to the individual item type, SourceData, with the values reversed:
public Visibility ItemVisibility { get { return Visibility.Visible; } }
public Visibility GroupHeaderVisibility { get { return Visibility.Collapsed; } }
With these properties in place, my item template contains content for both kinds of item, and uses the properties to ensure that only the part required is shown:
<DataTemplate>
    <Grid Height="40">
        <TextBlock
            Visibility="{Binding GroupHeaderVisibility}"
            FontWeight="Bold"
            FontSize="24"
            Text="{Binding Town}" />
        <TextBlock
            Visibility="{Binding ItemVisibility}"
            FontSize="20"
            Text="{Binding Address}" />
    </Grid>
</DataTemplate>
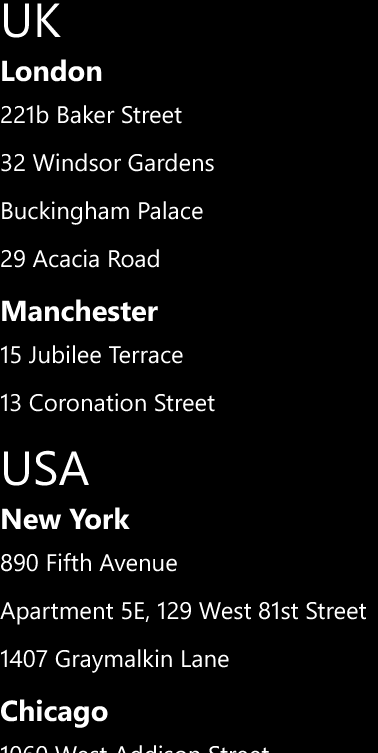
This works pretty well, and is visually indistinguishable from the final example in the previous article:
You can download a solution containing a universal app illustrating this technique in use on both Windows Phone and Windows from here.
The main problem with this approach is that every element in the list ends up carrying both sets of visuals, meaning that the visual tree contains a lot of unnecessary weight. (Even if an item is invisible, there’s a price to pay for having it in the visual tree.) For this very simple example, it’s not a major problem, but you don’t have to add very much visual complexity before it starts to become an issue for performance (particularly on low-end devices).
In my real app, I saw a second problem. (It’s not visible in this example, and I’m guessing that’s because it uses considerably simpler item templates than the real app.) I found that the app had a much harder time keeping up with scrolling. If you scroll fast enough, eventually you’ll start seeing gaps in the list, which are filled in after a short delay, and on the low-end device I use for testing, this happened at much lower scroll speeds than with the solution I eventually used (template selectors).
I tried using this visibility property technique in a Windows 8 app a while ago, and saw yet another issue: sometimes, when scrolling quickly through a list, items ended up in the wrong mode. This seemed to be something to do with container recycling, and it looked like reused containers got stuck in whatever mode they had been in before, even if their item type had changed. I never got to the bottom of why that was—it might even have been a WinRT bug that has been fixed in a subsequent update. (This was a while ago.) In any case, I didn’t see anything similar occurring with this example.
Finally, you get a lot of binding warnings when debugging with this technique—even though the TextBlock bound to the Address property is hidden for group header items (which don’t have an Address property) XAML still reports the fact that it can’t find the property; binding is performed even for invisible elements.
So for all these reasons, this is not my favourite way to solve the problem.
Visual States
Another problem with the approach in the preceding section is that I’ve found designers don’t like it very much. It is a pain to design a single template with multiple modes driven by visibility property changes—the design tools don’t provide much help for this sort of thing. But there is a tool-supported alternative: visual states.
Visual states are normally associated with transitions that occur when something about a control changes, such as how a button modifies its appearance when you tap it. But it can also be used to define a number of different ‘modes’ for a UI element. Here’s the body of a user control that uses this technique:
<Grid Height="40">
  <VisualStateManager.VisualStateGroups>
    <VisualStateGroup x:Name="Type">
      <VisualState x:Name="GroupHeading" >
        <Storyboard>
          <ObjectAnimationUsingKeyFrames
            Storyboard.TargetProperty="(UIElement.Visibility)"
            Storyboard.TargetName="textBlock">
            <DiscreteObjectKeyFrame KeyTime="0">
              <DiscreteObjectKeyFrame.Value>
                <Visibility>Visible</Visibility>
              </DiscreteObjectKeyFrame.Value>
            </DiscreteObjectKeyFrame>
          </ObjectAnimationUsingKeyFrames>
        </Storyboard>
      </VisualState>
      <VisualState x:Name="Item" >
        <Storyboard>
          <ObjectAnimationUsingKeyFrames
            Storyboard.TargetProperty="(UIElement.Visibility)"
            Storyboard.TargetName="textBlock1">
            <DiscreteObjectKeyFrame KeyTime="0">
              <DiscreteObjectKeyFrame.Value>
                <Visibility>Visible</Visibility>
              </DiscreteObjectKeyFrame.Value>
            </DiscreteObjectKeyFrame>
          </ObjectAnimationUsingKeyFrames>
        </Storyboard>
      </VisualState>
    </VisualStateGroup>
  </VisualStateManager.VisualStateGroups>

  <TextBlock x:Name="textBlock"
    FontWeight="Bold"
    FontSize="24"
    Text="{Binding Town}" Visibility="Collapsed" />
  <TextBlock x:Name="textBlock1"
    FontSize="20"
    Text="{Binding Address}" Visibility="Collapsed" />
</Grid>
Here’s the code behind that selects the visual state based on the data item type:
public sealed partial class ListItemView
{
    public ListItemView()
    {
        this.InitializeComponent();
        this.DataContextChanged += OnDataContextChanged;
    }

    private void OnDataContextChanged(
        FrameworkElement sender, DataContextChangedEventArgs args)
    {
        string state = args.NewValue is TownGroup ? "GroupHeading" : "Item";
        VisualStateManager.GoToState(this, state, false);
    }
}
There are a couple of reasons for making this a user control. First, it acts as the scope for the visual states. And second, we need some code behind to detect data context changes and to change the state accordingly. (This is one occasion where code behind really is justified—there isn’t much point pushing this sort of code into a view model, because you’d need more work to hook it back up to the view than you saved by pushing out in the first place!)
You can download a Universal app using this technique from here.
This approach has all the same problems as the visibility property switching solution. In fact, it’s considerably worse: by introducing a user control to enable state switching, we significantly increase the weight of each list item in the visual tree. On my low-end test phone, I can see items blanking out as I scroll upwards through the list even with this simple test app, and it’s particularly intrusive with the more complex UI in my real app. So in practice, this seems noticeably worse than the previous technique. And of course, I get all the same binding errors in the debugger because this relies on the same basic idea of making one or other of the two views invisible.
The only benefit of this method is that it’s slightly easier for designers to work with in Blend.
Switching Appearance in Code
On a few occasions, I have come across suggestions that data binding is expensive in WinRT user interfaces, and that it is more efficient to set properties on UI elements directly. This has always seemed surprising to me, considering all the work that has to be done in either case. For example, layout and rendering have to happen whether you use data binding or not. These both involve a lot of work, a lot of which has to be redone far more often than data binding operations. Data binding, on the other hand, involves reading a property; how expensive can that really be?
OK, I know WinRT is a COM-based cross-language system, so it’s going to require more work than reflection-based property reads in a pure .NET environment, which are more expensive still than compiled property reads. But the latter take less than a nanosecond, so even if we’re talking 1,000 times slower for a data binding, that’s still in sub-microsecond territory, and a screen of data in my app binds to a few hundred properties. So allowing even a few milliseconds to read them all seems generous, and it’s not like they need to be read every frame—in practice, after the initial screen load you’d see maybe as many as ten property reads a second when scrolling. It’s difficult to imagine how that could be anything like as expensive as the work required to decide where every visual element goes, and how to generate instructions for rendering them in terms that the GPU will understand.
Nevertheless, it’s always a mistake to make performance decisions based purely on reasoning, because real applications have a way of surprising you. It is essential to measure performance, to see how well your theories match reality. I therefore tried modifying my real app to avoid data binding, setting properties on UI elements directly instead.
This was a lot of work, and it had no performance impact that I was able to detect. Why some people recommend this remains a mystery to me. Perhaps there are scenarios where it makes a difference, but apparently mine isn’t one of them.
Consequently, I’m not going to repeat the work for the simpler example I’ve been using in these articles; there is no download to illustrate this particular technique.
Template Selector
In the absence of classic XAML automatic type-driven template selection, the obvious way to show different visuals for different item types is to write a template selector. If you’re not familiar with them, template selectors are just objects that decide which template to use for each source item. They are tailor made for the problem I’m addressing in this article, so it’s perhaps unsurprising that I ended up using them. (But it’s good to know that it is the best of the available options.)
I could have written a selector that was specialized for my app, choosing between templates for group headers or items. But I decided to write something that I think is a bit more useful. I’ve written a selector which lets you associate templates with types. This is the exact same code that I’m using in my real app, incidentally (and I intend to reuse it, hence the XML doc comments):
// --------------------------------------------------------------------------------
// <copyright file="TypeBasedTemplateSelector.cs" company="Interact Software Ltd.">
// © 2014 Interact Software Ltd.
// </copyright>
// --------------------------------------------------------------------------------

namespace TemplateSwitching
{
    using System.Collections.Generic;
    using Windows.UI.Xaml;
    using Windows.UI.Xaml.Controls;
    using Windows.UI.Xaml.Markup;

    /// <summary>
    /// Template selector for choosing between templates based on item types in
    /// a heterogeneous list.
    /// </summary>
    [ContentProperty(Name = "Templates")]
    public class TypeBasedTemplateSelector : DataTemplateSelector
    {
        private readonly Dictionary<string, DataTemplate> _templates =
            new Dictionary<string, DataTemplate>();

        /// <summary>
        /// Gets a dictionary in which templates can be associated with type names.
        /// </summary>
        /// <summary>
        /// For each item, this selector will look for an entry in this dictionary
        /// in which the key matches the name of the item type.
        /// </summary>
        public Dictionary<string, DataTemplate> Templates
        {
            get { return _templates; }
        }

        /// <summary>
        /// Gets or sets the data template to use for items whose types do not match
        /// any of the type names in the <see cref="Templates"/> dictionary.
        /// </summary>
        public DataTemplate DefaultTemplate { get; set; }

        /// <inheritdoc/>
        protected override DataTemplate SelectTemplateCore(object item)
        {
            DataTemplate template;
            if (item == null || !Templates.TryGetValue(item.GetType().Name, out template))
            {
                template = DefaultTemplate;
            }

            return template;
        }
    }
}
Here’s the body of the main page of the Windows Phone app using this selector (and the XAML for the non-phone app is nearly identical):
<Page.Resources>
    <CollectionViewSource
        x:Key="src"
        IsSourceGrouped="True" />
    <sel:TypeBasedTemplateSelector
        x:Key="typeSelector">
        <sel:TypeBasedTemplateSelector.DefaultTemplate>
            <DataTemplate>
                <TextBlock
                    Text="{Binding Address}"
                    Height="40"
                    FontSize="20" />
            </DataTemplate>
        </sel:TypeBasedTemplateSelector.DefaultTemplate>

        <DataTemplate
            x:Key="TownGroup">
            <TextBlock
                Text="{Binding Town}"
                FontWeight="Bold"
                Height="40"
                FontSize="24" />
        </DataTemplate>
    </sel:TypeBasedTemplateSelector>
</Page.Resources>

<Grid>
    <ListView
        ItemTemplateSelector="{StaticResource typeSelector}"
        ItemsSource="{Binding Source={StaticResource src}}">
        <ListView.GroupStyle>
            <GroupStyle>
                <GroupStyle.HeaderTemplate>
                    <DataTemplate>
                        <TextBlock
                            Text="{Binding Country}"
                            FontSize="40" />
                    </DataTemplate>
                </GroupStyle.HeaderTemplate>
            </GroupStyle>
        </ListView.GroupStyle>
    </ListView>
</Grid>
As you can see, I create an instance of my template selector as a resource. Its DefaultTemplate property determines the template to use when an item doesn’t match any other template, and I’ve chosen to put my item template in there. And then you populate the body of the selector as a dictionary, associating strings with templates. The string is the simple (non-namespace-qualified) type name. (I could have used the full name, but I find the short name easier to read, and I’ve never had an app with a single list containing two elements with types with the same simple name but difference namespaces.)
So that example defines one template to use when items are of type TownGroup, and a default template to use in all other cases.
Finally, I tell the ListView to use this selector as its ItemTemplateSelector. (I’ve still got a GroupStyle to define the look of the country groups. Remember, I’m still using the built-in grouping support for the outermost groups.)
You can download a Universal app to try this technique out on either Windows or Windows Phone.
The Story So Far
The best bet for multi-level grouping appears to be to use the ListView control’s built-in grouping features for the top-level groups, and to handle nesting by having each group present a flat collection containing a mixture of group heading items and child items. The ListView is oblivious to the fact that these inner items represent nested groups—it just sees them all as children of the top-level groups. And the best way to distinguish the headers and items visually seems to be to use a template selector.
So are we there yet? Well not quite. If you run the app, you’ll see that if you scroll through it quickly on a phone, you get some occasional horizontal jiggling. It turns out that this isn’t really a grouping issue, and it’s possible to fix that while using the grouping strategy I’ve described. (I’ll show how in a later article.)
But there’s another problem lurking here. You may have noticed that with the exception of the completely unviable techniques I tried in the first article, all of my examples so far have used the same item height for both the town header and the address. (The TextElements in the templates shown above both have an explicit Height.) I can’t do that in my real app—I need the time header to be a little larger than the item to make it look like the Windows Phone 8.0 agenda view. And as I’ll describe in the next article, things go slightly wrong when you do that.
So the approach I’ve shown here is only usable if you’re OK with your nested group headers having exactly the same height as your items. (This might actually be caused by a bug in WinRT, so it’s possible that future updates to Windows Phone will fix this, but it’s a problem as of the initial release of Windows Phone 8.1. The problem does not affect Windows 8.1, because the ListView doesn’t present a sticky group header—as you’ll see, the problem seems to revolve around that feature, which is only present on Windows Phone.)
So next time, in the final article on ListView grouping (although not the final article in this series) I’ll show what I eventually did in my real app.
Flattening Groups for ListView
This is the second article in a series exploring some of the technical challenges I encountered while writing my Agenda View Windows Phone app. Last time, I described the grouping features built into the ListView control available to store apps. (My example was a Windows Phone app, but it also applies to Windows 8 apps and Universal apps that run on both phones and tablets.) This built-in functionality wasn’t quite sufficient, because it only works for a single level of grouping, and things go wrong if you try to work around this by nesting some sort of ItemsControl in each item.
It took a couple of iterations to arrive at the solution the app eventually used. This article describes the first attempt. As you’ll see in the fourth article in this series, I ended up needing to refine it a little further, although the same basic idea described in this article still applies.
The solution was to avoid using multiple levels of grouping. Now that may not sound like much of a solution, given that nested groups are a non-negotiable requirement. However, all my app really needed was to provide the appearance of multiple levels of grouping. So although the app needs to reflect the logical structure I showed in the previous blog:

the user will be none the wiser if we implement it with this simpler structure.
As with last time, the dotted boxes are just annotations I’ve added to a screenshot to illustrate how the areas on screen correspond to objects in the application. Now, we’ve only got one level of grouping—as before there’s a group for each day, but as well as containing items representing time groups, this also contains the individual list items directly.
So although the time groups are present, the ListView does not seem them as groups at all—they’re items just like the ones representing the appointments themselves.
The big change here is that my outer group objects must now provide a heterogeneous list of children. In the context of the town and country examples I used last time, instead of my root collection being a collection of groups, with its definition starting like this:
public class CountryGroup : ObservableCollection<TownGroup>
or being a collection of the underlying items, as I had with my original single-level data:
public class CountryGroup : ObservableCollection<SourceData>
it now needs to be a collection where each item can represent either a town group or an item within a town group. There are a couple of ways to do this. One would be to introduce a new class called something like TownOrGroup (or, if you prefer, ItemViewModel, to make it clear that it’s a type whose purpose is to represent items in the list). The other option is to make the group class derive from ObservableCollection<object>. (Sadly, the CLR doesn’t support additive types, so there’s no native way to represent ‘either a TownGroup or a SourceData’ but that’s what we mean.)
I’ll go with the latter for now. So my country group looks like this:
public class CountryGroup : ObservableCollection<object>
{
    public CountryGroup(IEnumerable<object> items)
        : base(items)
    {
    }

    public string Country { get; set; }
}
My town group is no longer responsible for actually containing the items—it just acts as a header that sits in front of the group. So it now looks like this:
public class TownGroup
{
    public string Town { get; set; }
}
The SourceData class representing individual items remains unchanged.
The code to build the data into what look like groups now looks a little different. For each country, we need to generate a single list which contains, for each town group, an item representing the town, and then all the items in that town. No matter how many towns groups there are, we want a single list, so the list might go TownGroup, SourceData, SourceData, TownGroup, SourceData, etc.
While it would be possible to build one big hairy LINQ query to make this, I find it easier to split things up. So to begin with, here’s a method that takes a set of items grouped by town (in the form that a grouped LINQ query would produce) and turns them into a single flat list starting with a TownGroup, followed by all the SourceData objects in that group.
public static IEnumerable<object> ItemsForTownGroup(
    IGrouping<string, SourceData> townGroup)
{
    object[] groupItemAsList = { new TownGroup { Town = townGroup.Key } };
    return groupItemAsList.Concat(townGroup);
}
Next, here’s a method that takes all of the items in a country group, groups them by town, runs them through the preceding function to generate a list of items for each town group, and then concatenates all those lists into one big flat list:
public static IEnumerable<object> FlattenedTownGroupsForCountry(
    IEnumerable<SourceData> countryGroup)
{
    return countryGroup.GroupBy(item => item.Town).SelectMany(ItemsForTownGroup);
}
I’ve called the LINQ operators directly because on this occasion I happen to find them easier to read than a LINQ query, but if you prefer that form, this does the same thing:
public static IEnumerable<object> FlattenedTownGroupsForCountry(
    IEnumerable<SourceData> countryGroup)
{
    return
        from item in countryGroup
        group item by item.Town into townGroup
        from item2 in ItemsForTownGroup(townGroup)
        select item2;
}
Finally, we can use this to populate the country groups:
var countryGroups =
    from item in SourceData.GetData()
    group item by item.Country into countryGroup
    select new CountryGroup(FlattenedTownGroupsForCountry(countryGroup))
    {
        Country = countryGroup.Key
    };

var cvs = (CollectionViewSource) Resources["src"];
cvs.Source = countryGroups.ToList();
To display this, I can use the same XAML as I did in the first snippet showing a ListView from the previous blog. The result looks like this:

Well that has sort of worked. The structure is exactly right—we have country group headings, and then within that group headings for each town, followed by each of the items in that town. However, this isn’t really how we want to display it—I’m using the same ItemTemplate for every item in the list, which means that it attempts to display headings in exactly the same way as it displays individual items: as a town followed by an address.
For list items that are of type TownGroup, there is no Address property, so we just end up with a blank space for the second row of the item—that’s why there’s a big gap after the first London, and another one after the first Manchester. (If you run this with a debugger attached, you’ll see it complain about data binding failures.) And then for items of type SourceData, we show both the town and address again.
What we really want is to show just the town for TownGroup items, and just the address for SourceData items. One slightly hacky way to do this is to define a new property on both source types with the same name called something like DisplayText that displays whatever we want to use as the text for that item. (Obviously in a real app you’d want to do this in a view model type rather than directly on your underlying model.) And you could even arrange for differences in style by defining a properties to control the font weight and size. So here’s the modified TownGroup:
public class TownGroup
{
    public string Town { get; set; }

    public string DisplayText { get { return Town; } }
    public FontWeight Weight { get {  return FontWeights.Bold; } }
    public double FontSize { get { return 24; } }
}
And we can add three corresponding properties to SourceData:
public string DisplayText { get { return Address; } }
public FontWeight Weight { get { return FontWeights.Normal; } }
public double FontSize { get { return 20; } }
We can now use a simpler ListView item template:
<DataTemplate>
    <TextBlock
        Height="40"
        FontWeight="{Binding Weight}"
        FontSize="{Binding FontSize}"
        Text="{Binding DisplayText}" />
</DataTemplate>
Here’s the result:
That’s now working well. (You can download the project from here. If you try it, you may notice that although the wild layout problems from last time are not apparent, there’s some occasional mild horizontal jiggling. I’ll show how to fix that later in this series.) But we have a problem: the visual distinctions between the town group headers and the individual items are controlled entirely through properties on the data source items. That is likely to be a problem if you want a designer to work on your application, because it means you will have to make code changes to support more or less any visual design change.
Moreover, this technique doesn’t work well if you need headers and items to look significantly different. Going back to my app, you can see that I have exactly that requirement:

Time group headers contain one fairly large piece of text, while individual appointments within a time group contain two lines of text—the appointment subject, and then the duration and location—and also an indicator on the right showing whether the time is marked as busy, out of office, tentative etc.
So, we need to do more. The technique of using heterogeneous list items to make it look like you’ve got multiple levels of grouping is a good one, but we really need some way to enable different element types to have different appearances, without having to add a bunch of ad hoc properties to our source objects. That will be the topic of the next entry in this series.
Windows Phone ListView and Grouping
This is the first article a series exploring some of the technical challenges I encountered while writing my Agenda View Windows Phone app. My first topic is multi-level grouping. Surprisingly, doing this well turns out to be sufficiently hard that I’ll be writing four articles on it!
Note that although I'm discussing a phone app, most of the content in these articles is applicable to Windows 8 store apps and Universal apps.
In this first article, I’ll show the ListView control’s built-in grouping features, and explain why they’re not quite sufficient for this app. I’ll also show an alternative approach that enabled multi-level grouping with very little work, but which turned out to have problems when applied to real data. In later articles I’ll explain what I ended up doing instead.
The App’s Grouping Requirements
The app displays appointments grouped by both time and day. If you happen to have conflicting appointments that start at the same time, these will come under a single heading showing that time. And at a wide scale, all of the day’s appointments are grouped under a heading showing either the text TODAY, or the relevant date if the appointment is further out. I’ve annotated a screenshot to show precisely how grouping occurs:
I’ve outlined individual items in red. These are grouped by start time, as shown with the green outlines. And those time groups are in turn grouped by day, shown here with a blue outline. I’ve also shown the same hierarchy in a sort of treeview-like structure to the side.
Most items have a distinct start time—people usually try to avoid scheduling multiple simultaneous appointments, so you’d normally expect each time group to contain exactly one item. But sometimes collisions occur, and in this case, you can see I’ve got two items in the time group for 6:30pm near the top. That’s why I need an additional level of grouping within the day groups.
This logical structure was non-negotiable, because this is how the Calendar app used to show things (up until the Windows Phone 8.1 update removed the agenda view) and the entire point of my app was to provide something as close as possible to the original feature. However, this turns out not to be totally straightforward, because the ListView control available in store apps does not support multi-level grouping. (I can only assume that the original Calendar app didn’t use XAML.)
ListView’s Built-In Grouping
All of Microsoft’s XAML frameworks support grouping, but the way this works has changed with the introduction of WinRT (or ‘store apps’ to use Microsoft’s current name for apps that use this API), first for Windows 8, and now for Windows Phone 8.1. With all the other versions of XAML, you would enable grouping with something like this:
<CollectionViewSource x:Key="src">
    <CollectionViewSource.GroupDescriptions>
        <PropertyGroupDescription PropertyName="Country" />
        <PropertyGroupDescription PropertyName="Town" />
    </CollectionViewSource.GroupDescriptions>
</CollectionViewSource>
In pre-WinRT XAML, your data source supplied a flat list of items, and you asked the CollectionViewSource to gather it into groups for you, according to one or more grouping criteria. The example above states that items should be grouped by the value of their Country property, and then within each country group, items should be grouped by the value of a Town property. (By the way, the Windows Phone version of Silverlight doesn’t support this properly. It accepts the XAML above, but it appears to ignore everything after the first level.)
But if you use WinRT (because either you’re writing a Universal app that targets both tablets and phones, or you’re writing a Windows 8 store app, or you’re writing a phone-only app and have chosen to use the ‘store app’ template instead of the Silverlight one) things are different. Data binding will not group the data for you. You must supply it with a collection of collections, e.g.:
public class CountryGroup : ObservableCollection<SourceData>
{
    public CountryGroup(IEnumerable<SourceData> items) : base(items)
    {
    }

    public string Country { get; set; }
}
If you have a flat list, you can build the groups easily enough:
IEnumerable<CountryGroup> groups =
    from item in SourceData.GetData()
    group item by item.Country into countryGroup
    select new CountryGroup(countryGroup)
    {
        Country = countryGroup.Key
    };
Next, you need a CollectionViewSource with grouping enabled:
<CollectionViewSource
    x:Key="src"
    IsSourceGrouped="True" />
You can then supply that with your group list, either in code behind:
var cvs = (CollectionViewSource) Resources["src"];
cvs.Source = groups.ToList();
or you could hook it up with data binding. Either way, the goal is to supply a collection of collections to the Source property of a CollectionViewSource in which IsSourceGrouped is true.
With this in place, you can now use it in a ListView, and you provide a group style to determine how the group headings should appear:
<ListView
    ItemsSource="{Binding Source={StaticResource src}}">
    <ListView.GroupStyle>
        <GroupStyle>
            <GroupStyle.HeaderTemplate>
                <DataTemplate>
                    <TextBlock
                        Text="{Binding Country}"
                        FontSize="40" />
                </DataTemplate>
            </GroupStyle.HeaderTemplate>
        </GroupStyle>
    </ListView.GroupStyle>

    <ListView.ItemTemplate>
        <DataTemplate>
            <Grid Height="80">
                <Grid.RowDefinitions>
                    <RowDefinition />
                    <RowDefinition />
                </Grid.RowDefinitions>
                <TextBlock
                    FontWeight="Bold"
                    FontSize="24"
                    Text="{Binding Town}" />
                <TextBlock
                    Grid.Row="1"
                    FontSize="20"
                    Text="{Binding Address}" />
            </Grid>
        </DataTemplate>
    </ListView.ItemTemplate>
</ListView>
Running the app shows the data grouped by country, using the group header template to display the country name at the top of the group:

That group header is ‘sticky’ in that it stays put at the top of the list as you scroll through the group:

As you scroll into the next group, its header slides into place, pushing the header of the previous group out of the way. Here’s that transition in action, half way through:
![]()
That’s all very well, but there’s an obvious problem with my example: within each group, I have several items all with the same town or city name. I’d like to group those too.
We could try adding a second group class, and modifying the top-level one:
public class TownGroup : ObservableCollection<SourceData>
{
    public TownGroup(IEnumerable<SourceData> items)
        : base(items)
    {
    }

    public string Town { get; set; }
}

public class CountryGroup : ObservableCollection<TownGroup>
{
    public CountryGroup(IEnumerable<TownGroup> items)
        : base(items)
    {
    }

    public string Country { get; set; }
}
The code to group a flat list of items is now a little more complex, thanks to having two levels, but it’s still the same idea:
IEnumerable<CountryGroup> groups =
    from item in SourceData.GetData()
    group item by item.Country
        into countryGroup
        let countryGroupItems =
            from item2 in countryGroup
            group item2 by item2.Town
            into townGroup
            select new TownGroup(townGroup)
            {
                Town = townGroup.Key
            }
        select new CountryGroup(countryGroupItems)
        {
            Country = countryGroup.Key
        };
But how do we present these nested groups? A glance at the ListView control’s GroupStyle property provides hope:
public IObservableVector<GroupStyle> GroupStyle { get; }
As with longer-established XAML frameworks like WPF, the GroupStyle property is a collection. So you’d think we can provide a style for each grouping level, just like we would in WPF. Here’s a ListView with two group styles, and a correspondingly simpler item template:
<ListView
    ItemsSource="{Binding Source={StaticResource src}}">
    <ListView.GroupStyle>
        <GroupStyle>
            <GroupStyle.HeaderTemplate>
                <DataTemplate>
                    <TextBlock
                        Text="{Binding Country}"
                        FontSize="40" />
                </DataTemplate>
            </GroupStyle.HeaderTemplate>
        </GroupStyle>
        <GroupStyle>
            <GroupStyle.HeaderTemplate>
                <DataTemplate>
                    <TextBlock
                        Text="{Binding Town}"
                        FontSize="24" />
                </DataTemplate>
            </GroupStyle.HeaderTemplate>
        </GroupStyle>
    </ListView.GroupStyle>

    <ListView.ItemTemplate>
        <DataTemplate>
            <TextBlock
                FontSize="20"
                Text="{Binding Address}" />
        </DataTemplate>
    </ListView.ItemTemplate>
</ListView>
Sadly, this doesn’t work. Here’s the result:

That’s not quite what we wanted.
It turns out that the ListView is just ignoring the second group style. It’s only grouping to a single level, and it is treating those TownGroup objects as the list items. The TownGroup has no Address property, which is why the item template displays nothing. If I modify the item template to bind to Town (a property that is available on TownGroup) instead of Address, I see this:

The effect is that I’ve got a list of towns grouped by country—just a single level of grouping. The ListView is oblivious to the individual items within each country group.
The bottom line is that ListView does not support groups of groups of items.
Lists within Lists
Anyone with much XAML experience will probably think of an obvious solution at this point: if the item template is being given the nested group, why not just make that expand the children? We can go back to having a single group style (because ListView will ignore all but the first) and then in our item template (which, remember, is now being passed the nested TownGroup objects), we show the Town property as the group title, and then an ItemsControl to show all the items in the group:
<ListView
    ItemsSource="{Binding Source={StaticResource src}}">
    <ListView.GroupStyle>
        <GroupStyle>
            <GroupStyle.HeaderTemplate>
                <DataTemplate>
                    <TextBlock
                        Text="{Binding Country}"
                        FontSize="40" />
                </DataTemplate>
            </GroupStyle.HeaderTemplate>
        </GroupStyle>
    </ListView.GroupStyle>

    <ListView.ItemTemplate>
        <DataTemplate>
            <Grid>
                <Grid.RowDefinitions>
                    <RowDefinition />
                    <RowDefinition />
                </Grid.RowDefinitions>
                <TextBlock
                    FontWeight="Bold"
                    FontSize="24"
                    Text="{Binding Town}" />
                <ItemsControl
                    Grid.Row="1"
                    ItemsSource="{Binding}">
                    <ItemsControl.ItemTemplate>
                        <DataTemplate>
                            <TextBlock
                                FontSize="20"
                                Text="{Binding Address}" />
                        </DataTemplate>
                    </ItemsControl.ItemTemplate>
                </ItemsControl>
            </Grid>
        </DataTemplate>
    </ListView.ItemTemplate>
</ListView>
At first glance, this appears to work:
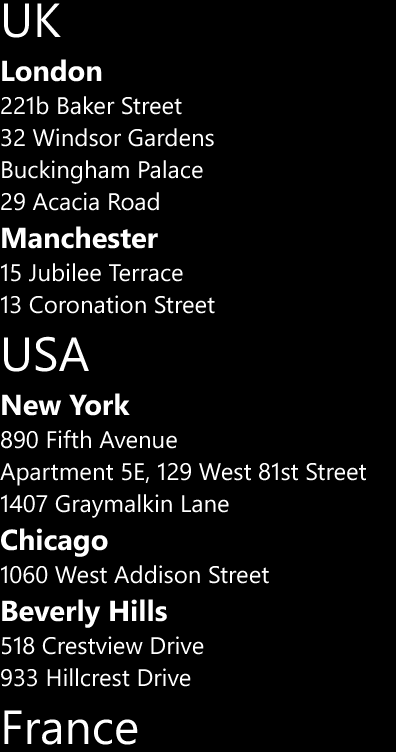
That certainly looks like what I wanted: everything is grouped by country, and within each country the items are grouped by town, and I’ve been able to define a different style for the two group levels’ headings.
So what’s the problem?
Well the first obvious issue (for my app, at any rate) is that the individual items are no longer tappable—as far as this ListView is concerned, each item in the list is the whole town group. I tried replacing the ItemsControl in the item template with a nested ListView as a quick fix, but that just seemed to slow things down drastically. When I do that, the app has trouble keeping up with even fairly pedestrian scrolling on the phone I use for development. (A Nokia Lumia 620.) However, while this hack didn’t work, I expect it’s possible to make individual items tappable with suitable changes to the item template.
But there’s another problem: it turns out that whether you nest a ListView or an ItemsControl this solution doesn’t work well once you start using anything more than about one and a half screen’s worth of data. (This means that if, like me, you build a prototype to test whether your approach is viable, it all looks like it’s working beautifully until you plug in some real data, and only then do you discover that you’ve gone down a blind alley. I hope that this series of articles will save you from that fate.)
The problems really only become apparent when you start scrolling back up through the list having scrolled down through it. The content starts jumping around on the screen, and sometimes the entire list goes blank for a few seconds before reappearing.
If you want to see the issues yourself, you can grab the app from here. Run it on a real phone, and scroll a long way down through the data, and then back up again reasonably quickly. You’ll see pretty quickly that this is not a usable solution.
As far as I can tell, the fundamental problem is that virtualization does not mix well with variable item heights. (Switching virtualization off is not a realistic option for my app, by the way.) There’s a subtle but critical difference between the item template in the last XAML snippet, and the one in the first ListView snippet in this blog entry. Here’s the important bit from the first one:
<ListView.ItemTemplate>
    <DataTemplate>
        <Grid Height="80">
And here’s the corresponding piece of the one that didn’t work well:
 <ListView.ItemTemplate>
     <DataTemplate>
         <Grid>
The key is that the first example has a fixed height, but the second one doesn’t. It can’t, because that the second one contains an ItemsControl whose height will depend on the number of items in the group—the nature of that example is that each item (and remember, an ‘item’ in that example is actually group of addresses all in the same town) will need to determine its own height based on the number of items it contains.
In classic XAML terminology, the first item template has a constrained height, while the second sizes to content.
Variable item height has always been a problem for virtualized lists in XAML. (If you happen to have a Pluralsight subscription, take a look at the Templates module of my WPF and XAML Fundamentals course. If you watch the “ItemsControl Options” clip (12th clip in the module), starting at about 4:45 you get to see a WPF ListView going slightly haywire as a result of highly variable item sizes in a virtualized list.) And this in turn has meant that grouping has always been a tricky case, because groups almost always vary in height. So in a lot of scenarios, grouping in XAML just disables virtualization.
Variable item height seems to cause particularly visually distracting problems for the WinRT ListView. As far as I’ve been able to tell in discussions with people from Microsoft, the problems occur when it starts recycling containers that have scrolled off the screen—if those change size significantly when given new data, this appears to mess with the layout of the items that are still on the screen, causing the entire list to jump around in a rather disturbing way.
This turns out to be one of the main reasons for getting the ListView to help us with grouping in the first place. You can use that ItemsControl-in-item-template trick to handle any number of levels of grouping, including a single level, and if the trick actually worked properly, we wouldn’t really need ListView to provide built-in support for groups at all. (About the only thing it would really be doing for us is the neat ‘sticky’ group headers that slide into place as you scroll.) But because it’s pretty rare for each of the groups in a grouped list to have the same size, the trick does not in fact work. The virtualization mechanism goes a bit crazy trying to deal with the variation in sizes, and the result is that the app appears to be having a fit.
So in practice, the biggest benefit of using the built-in group support in the ListView is that it takes care of interleaving group headings for you in a way that the control’s underlying virtualizing panel can cope with, meaning that everything scrolls around nice and smoothly. As soon as you try to handle this yourself, it all seems to break down.
Conclusion
If you want just one level of grouping, the built-in support provided by ListView is excellent. But if you want groups of groups, it cannot help you. In the end, I needed to use a radically different approach to solve this problem, which I’ll describe in the next article in this series.
Agenda View for Windows Phone 8.1
I’ve written an app for Windows Phone 8.1 called Agenda View. It puts back a feature that was built into earlier versions of Windows Phone, but which went missing in the 8.1 update.
Calendar App Before 8.1
When I first installed a public preview of Windows Phone 8.1, I noticed some striking changes to the built-in Calendar app. For the most part, it’s an improvement—in addition to the old day and month views, we get two new views: year, and, most usefully, week. However, we lost something: the old agenda view.
The agenda view, present up to Windows Phone 8.0, but not beyond that, presents all your upcoming appointments in a simple list:

I much prefer this to the day view, because the day view makes it too easy to miss things. It can only show 8 hours at once, or less if you have a few all-day appointments. (Those sit at the top, reducing the space available for the rest of the day.) So if you have appointments early in the morning and also some in the evening, you can’t see them all at once. It’s really easy to look at the day view and think you’ve got nothing on for the day:
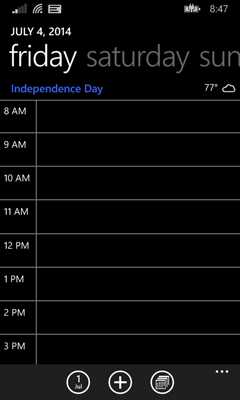
In fact I’ve got a few appointments for that day in the morning, late afternoon, and evening. There’s no way to see that at a glance—I have to scroll up and down to look for early or late appointments.
The agenda view doesn’t have this problem, because it shows all your appointments in order with no gaps—it makes no attempt to space items out according to the time between them. So on days such as the one shown above where I’ve got morning and evening appointments and nothing in the middle, I can see the whole day at a glance:

Sadly, the Windows Phone 8.1 update removes this useful view.
Windows Phone 8.1 Calendar
Windows Phone 8.1’s new week view goes some way to making up for the loss of the old agenda view: it shows as many appointments for each day as it can fit, and like the old agenda view, it shows them in a simple list, rather than spacing them according to time of day like the day view. The problem is that by fitting an entire week onto the screen, it doesn’t take many appointments before they don’t fit. You can tap on a day to expand it, but this only makes a little more space:

You can scroll through the items of course, but because the list is so small, this is more fiddly than with the old agenda view, and in any case, it’s a much less convenient way to see everything you’ve got coming up for the day than a straightforward list filling the screen.
Putting the Agenda View Back
Because the agenda view was my preferred way to look at my calendar, I decided to write an app that works in the same way. It’s not identical—for one thing, it only supports this one mode. (You can use the built-in calendar app if you want the other views.) This removes the need for navigation chrome at the top, making the entire screen available for your appointments:
This means you can see even more of your appointments at a glance.
You can find the app in the Windows Phone store at http://www.windowsphone.com/en-us/store/app/agenda-view/3973880d-95f6-4f36-b8d2-ced2c49eb3f4 and there’s also a simple site for the app at http://windows-phone-agenda.com/. (Thanks to Felix at http://blackspike.com/ for the design work on that site.)
Some aspects of this apparently simple app were surprisingly technically challenging. (E.g., getting groups within groups to work, when the ListView supports only a single level of grouping; updating a collection of view models from a source in which items may randomly appear or disappear without disrupting the scroll position, or scroll animations in progress.) So over the next week or two, I’ll be posting blog entries on various technical details of the app.
Windows Phone 8.1 and MSB3774 Errors
During this year’s Build conference, Microsoft released a release candidate of update 2 for Visual Studio 2013, which enables you to build Windows Phone 8.1 apps (amongst other things). However, you may find that if you create a Unit Test project for a Windows Phone 8.1 Store App (i.e., using the new WinRT-based API) you get the following build errors:
C:\Program Files (x86)\MSBuild\12.0\bin\Microsoft.Common.CurrentVersion.targets(1864,5): error MSB3774: Could not find SDK "MSTestFramework, Version=12.0".
C:\Program Files (x86)\MSBuild\12.0\bin\Microsoft.Common.CurrentVersion.targets(1864,5): error MSB3774: Could not find SDK "TestPlatform, Version=12.0".
This happens if you did not install the Windows Phone 8.0 tools when installing Visual Studio 2013. Apparently, the Windows Phone 8.1 unit test features in Update 2 rely on these 8.0 components, and the Update 2 RC installer will not install them for you if they are missing. If you’re in this situation, Visual Studio (with update 2) still offers a ‘Unit Test App (Windows Phone)’ project template under 'Visual C# -> Store Apps -> Windows Phone Apps' in the Add New Project dialog, but sadly, that template will produce the errors shown above when built.
Fortunately, this is easily fixed. If you re-run the original Visual Studio 2013 installer (not the update installer, but the one you used to install Visual Studio 2013 in the first place) it will detect that VS is already installed, and it offers a “Modify” button. If you click that, it will let you check the box for the Windows Phone 8.0 tools.
Once you’ve got the 8.0 tools installed, WinRT-based (‘Store’) unit test apps for Windows Phone 8.1 will no longer produce these errors.
Recursion Schemes and Functors
Erik Meijer recently tweeted a link to Patrick Thomson’s post on recursion schemes. (Erik was the driving force behind two of my favourite technologies of the last decade: LINQ and Rx. If you’re interested in programming languages, he’s well worth following on Twitter: @headinthebox.) It was an interesting article, but I felt it had a small issue: it conflates a very useful idea (recursion schemes) with some related but not strictly necessary Haskell-isms: the Functor type class, and fixed points of recursive-defined parameterised types.
I only dabble in Haskell, so it’s possible I’ve got this wrong. I was going to contact the article’s author (Patrick Thomson) directly for clarification, but couldn’t find his email details, so I decided to post this publicly, with the hope of drawing his attention to it via Twitter. I may yet be embarrassed if he points out a fatal flaw in my argument. Ah well.
Recursion Schemes
The idea at the heart of Patrick’s post seems to be this: we should separate the mechanisms for traversing data structures from the way in which we would like to process the data. His example is a data structure representing a simple syntax tree, and a ‘flatten’ method which walks through an expression tree removing parentheses. Initially, this flattening logic is intermingled with the code that walks the tree:
flatten :: Expr -> Expr
flatten (Literal i)     = Literal i
flatten (Paren e)       = flatten e
flatten (Index e i)     = Index (flatten e) (flatten i)
flatten (Call e args)   = Call (flatten e) (map flatten args)
flatten (Unary op arg)  = Unary op (flatten arg)
flatten (Binary l op r) = Binary (flatten l) op (flatten r)
There’s only one line of interest here, and it’s the version of the function that takes a Paren expression. The rest is essentially boilerplate that describes how to walk through his syntax tree data type.
By the end, he has two functions, topDown and bottomUp, which encapsulate two styles of tree traversal. This enables him to separate out the actual logic—flattening of parentheses—into a much simpler function:
flattenTerm :: Term Expr -> Term Expr
flattenTerm (In (Paren e)) = e  -- remove all Parens
flattenTerm other = other       -- do nothing otherwise
It’s very much easier to understand what this does (strips out parentheses, leaving everything else in place) than it was with the previous example, because it expresses only the important logic. To use it, we combine it with one of Patrick’s traversal functions:
flatten :: Term Expr -> Term Expr
flatten = bottomUp flattenTerm
This walks the syntax tree in a bottom-up fashion, passing each node through that flattenTerm function.
Clever Stuff
There are a couple of particularly clever aspects to the way Patrick achieves this. First, his topDown and bottomUp functions don’t know anything about his specific data type. They could work for any recursive data type. Second, he takes advantage of the Haskell compiler’s ability to generate code that can traverse a recursive data type for you; not only can you separate all the structural boilerplate I showed in the first example from the important logic, you don’t even have to write any of that code yourself.
He then goes on to do one more very clever thing: he recursively constructs a parameterised data type which is, in a sense, infinite. This is an excellent party trick, but it is also where I part company from Patrick a little. My view is that the only reason he needs this clever trick is because he’s been forced into it by a shortcoming of how the compiler generates traversal code. An ideal solution would, in my view, enable you to avoid this. But he seems to regard it as front and centre, rather than an unfortunate workaround:
“That these definitions emerged naturally out of fixed-points and functors, two concepts central to Haskell and to functional programming in general, is doubly amazing.”
To show why I disagree with Patrick on this point, I’ll show two things. First, I’ll show how he was effectively forced into the use of fixed-points as a result of a Haskell feature that suffers (in this particular application) from being a little too general. Second, I’ll show that it’s entirely possible to write equivalents of his topDown and bottomUp functions without using either fixed-points or Haskell’s Functor type class, and that the result is significantly simpler. (There is a loss of generality, but as I hope to show, that generality only adds unwanted complexity in this particular case, and cannot be exploited in practice.)
The Path to Functors and Fixed Points
Patrick starts with the excellent goal of not wanting to write or maintain boilerplate code that walks through his tree-like data structure. In most cases, writing this code is a mechanical process, driven entirely by the structure of the data type. It’s tedious to write, and easy to get wrong, and it essentially duplicates information that was already inherent to the data type’s definition. This is exactly the sort of thing that should be automated.
GHC (the most widely used Haskell compiler) has an optional feature that can write this code for you. This isn’t part of any official specification as far as I can tell; it’s an extension that you need to enable with either a command line switch, or a pragma in your source code:
{-# LANGUAGE DeriveFunctor #-}
With that in place, you can write this sort of thing:
data Foo a
  = NoFoos
  | OneFoo a
  | TwoFoos a a
  deriving (Show, Eq, Functor)
This defines a parameterized type. (Given my normal subject matter, I’m guessing most of my readers have a C# background, so if you’re familiar with C# but not Haskell, then firstly, thanks for reading this far, and secondly, that’s sort of like defining a generic type Foo<a>.) This is a slightly pointless sort of a container—it’s only for illustrative purposes here—that can contain either zero, one, or two items of whatever type you choose for the type parameter. For example OneFoo '!' is a Foo Char containing a single character; TwoFoos True False is a Foo Bool containing two Boolean values.
The interesting part is the final line: the deriving keyword tells the compiler that I’d like it to produce some code for me that makes Foo an instance of various type classes. Only a strictly limited set of known classes is supported here, because the compiler only knows how to generate code for certain types. In this case I’m asking it to generate code for the Show class (which enables any Foo to be turned into a string for display purposes), the Eq class (supporting value comparison) and Functor.
That last one is what enables traversal. Any type f that is an instance of the Functor class provides an fmap function with this signature:
fmap :: (a -> b) -> f a -> f b
The general idea is that a Functor is a container, and that fmap lets you apply a function over all of the items in a Functor. For example, a list is a Functor, so I could use fmap to square all the numbers in a list:
*Main> fmap (\x -> x * x) [1..5]
[1,4,9,16,25]
The function is allowed to change the type if it wants, so I might transform a list of numbers to a list of strings (using the show function available on all types that are an instance of the Show class; all numeric types are in that class):
*Main> fmap show [1..5]
["1","2","3","4","5"]
So broadly speaking, a Functor is a container for some particular type of data, and it might contain any number of pieces of data of that type, and we can use fmap to apply a transformation across all of those pieces of data, producing a new container with the same structure as the original, but holding that transformed data.
So what does that mean for our Foo type? We asked the compiler to provide Functor Foo for us by using the deriving keyword, but this just causes the compiler to generate code that looks more or less like this:
instance Functor Foo where
  fmap f NoFoos        = NoFoos
  fmap f (OneFoo a)    = OneFoo (f a)
  fmap f (TwoFoos a b) = TwoFoos (f a) (f b)
So just as I was able to use fmap to square all the numbers in a list I can now use it to square all the numbers in a Foo, as long as the Foo contains numbers (or contains nothing):
*Main> fmap (\x -> x * x) NoFoos
NoFoos
*Main> fmap (\x -> x * x) (OneFoo 2)
OneFoo 4
*Main> fmap (\x -> x * x) (TwoFoos 3 4)
TwoFoos 9 16
Likewise, I can apply the show function to all the items contained in a Foo, just like I did earlier with a list:
*Main> fmap show NoFoos
NoFoos
*Main> fmap show (OneFoo 2)
OneFoo "2"
*Main> fmap show (TwoFoos 3 4)
TwoFoos "3" "4"
So by putting Functor in the deriving list, the compiler generates fmap for our data type. And this is what Patrick takes advantage of—it enables him to avoid writing boilerplate for traversing his syntax tree data type.
However, there’s a problem: the generated fmap is all very well when our container doesn’t really care what it contains, but what if we want a recursive data type? Patrick’s example is a tree-like structure representing expressions—an expression may contain child expressions. Although his type is conceptually simple, it’s large enough to be slightly unwieldy, so I’ll be using a substantially simplified type that can still illustrate the same idea:
data Bar
  = Node Bar Bar
  | Leaf Int
  deriving (Show, Eq)
This lets us build very simple binary trees, where the leaves always contain a single Int. It’s a recursive data structure—for non-leaves, a Bar contains two child Bar items. Now you might reasonably want to process all the elements in such a tree like we’ve been doing already. Here’s a function that squares everything in a Bar.
squareBar :: Bar -> Bar
squareBar (Leaf i) = Leaf (i * i)
squareBar (Node l r) = Node (squareBar l) (squareBar r)
And here it is in use:
*Main> squareBar (Node (Node (Leaf 1) (Leaf 2)) (Leaf 3))
Node (Node (Leaf 1) (Leaf 4)) (Leaf 9)
That’s lovely, but we’re now back in the world of mingling our traversal with our functionality—squareBar is a mixture of code that knows how to traverse a Bar, and code that performs an operation (squaring the numbers). That’s no good, so how about we just add Functor to the list of classes in deriving? But that won’t work—the compiler complains:
Cannot derive well-kinded instance of form `Functor (Bar ...)'
  Class `Functor' expects an argument of kind `* -> *
The basic problem here is that fmap (which any Functor must supply) is able to change the type of the data it works on—as you saw earlier, I can transform a list of numbers to a list of strings. But my Bar type takes no type parameters, so there’s no way to produce a Bar that contains strings. So this is not a type that fmap can work for.
Now we could easily get rid of the error thus:
data Bar a
  = Node (Bar a) (Bar a)
  | Leaf a
  deriving (Show, Eq, Functor)
This works, and I can now write squareBar using the compiler-generated fmap:
squareBar :: (Bar Int) -> (Bar Int)
squareBar = fmap (\x -> x * x)
And this works as expected:
*Main> squareBar (Node (Node (Leaf 1) (Leaf 2)) (Leaf 3))
Node (Node (Leaf 1) (Leaf 4)) (Leaf 9)
However, this doesn’t really solve the problem I want to solve: fmap can only operate on the values stored in the leaves. What if I want to do something to the non-leaf nodes? For example, going back to my original non-parameterized Bar, I could write this:
leftBar :: Bar -> Bar
leftBar (Leaf i) = Leaf i
leftBar (Node l r) = Node (leftBar l) (Leaf 0)
This walks the tree, and, rather arbitrarily, for each non-leaf node it replaces the right-hand child with a leaf with a value of 0. Here it is in action:
*Main> leftBar (Node (Node (Leaf 1) (Leaf 2)) (Leaf 3))
Node (Node (Leaf 1) (Leaf 0)) (Leaf 0)
This is obviously pointless, but the general idea—being able to transform and possibly replace any node rather than just the leaves—is useful. Indeed, that’s exactly what Patrick’s doing in his example: he’s stripping out certain nodes (parentheses) from the syntax tree.
The problem with my parameterized type is that the generated Functor code targets the wrong thing: it lets me transforms the numbers in the leaves, and not the nodes themselves. In some situations the leaf values might be exactly what I want to change, but not here.
And this is where Patrick starts jumping through hoops. Rather than using the type parameter for the value in the leaves as I did, he uses it for the children. Here’s how that would look with my type:
data Bar a
  = Node a a
  | Leaf Int
  deriving (Show, Eq, Functor)
Now this is kind of weird: this type appears to say that non-leaf nodes no longer have to contain two Bar children. The children are of whatever type is supplied as our argument. But we do actually want those to be of type Bar, because this is, after all, supposed to be a simple tree-like recursive data structure. But that’s no longer clear at a glance.
The compiler may be able to do more work for us, but the price is a loss of clarity.
For our type to work as intended, we want the type argument for Bar to be Bar. But we can’t just say Bar Bar, because that second Bar itself needs a type argument. So how about Bar (Bar Bar)? Well again, we’ve got a problem because that last Bar needs a type argument too. So you want a sort of infinite type: Bar (Bar (Bar (Bar …etc))).
Fortunately, Haskell is a sufficiently clever language that you can create such a type. (The resulting infinite type is the “fixed point” Patrick refers to.) It is possible to define some type X such that X is synonymous with Bar X. This implies that Bar X is synonymous with Bar (Bar X) and also Bar (Bar (Bar X)) and so on. This in turn means that if you have a Bar X, then its children in non-leaf nodes are also of type Bar X: we can have the recursive data structure we want.
Patrick achieves this by writing what is effectively a Y combinator in the type system. Here’s something equivalent to what he does (although he calls it Term):
data Mu f = In (f (Mu f))
out :: Mu f -> f (Mu f)
out (In t) = t
If we then write Mu Bar, that turns out (for slightly brain-melting reasons) to denote a type which has the characteristics I described for “some type X” a few paragraphs ago.
Where does this get us? Well it enables us to use a parameterized definition of Bar in which the children of non-leaf nodes (rather than the leaves) use the type parameter while still being of the same type as their container. This in turn means that the compiler-supplied Functor implementation now works over the nodes rather than the values in the leaves.
However, it’s all now rather inconvenient. Even if you’re able to take the fixed point of an infinitely recursive type definition in your stride, working with trees now becomes a good deal more inconvenient because we have to build everything via the In constructor in order to use the fixed point type. So instead of:
(Node (Node (Leaf 1) (Leaf 2)) (Leaf 3))
we must now write:
(In (Node (In (Node (In (Leaf 1)) (In (Leaf 2)))) (In (Leaf 3))))
These In functions tend to litter our code, as does the related out function when we want to work with the information in our tree. And it’s all because Functor demands that its type argument is itself a parameterized type. And the only reason it requires that is to allow the function we pass to fmap to change the type as part of its transformation. But if you’re still keeping up, you’ll notice that we can’t actually take advantage of that! The whole point of jumping through this fixed point type hoop was to enable our Bar to contain children of type Bar, so in practice, the first argument to fmap will always be (Mu Bar -> Mu Bar). All this complexity arises because of the generality of fmap, generality that we cannot in fact exploit.
A Simpler Approach
Instead of fmap’s too-general signature:
Functor f => fmap :: (a -> b) -> f b -> f b
all we really need is this:
efmap :: (a -> a) -> a -> a
Or to put that back into the context of our example, when we’re walking a tree, we’re always going to be mapping nodes onto nodes. In my case, that means a Bar is always mapped to a Bar; in Patrick’s example, that means an Expr is always mapped to an Expr. This is always the case in practice for these examples—when using fmap in this way, its two type arguments (a and b) will always refer to the same type.
I’ve called my degenerate fmap efmap, because it think a functor that maps onto the same type as its input is called an endofunctor. However, I’m not totally sure about that—I’ve read in a couple of places that all Haskell functors are technically endofunctors. I don’t understand the arguments that lead to this conclusion, so I’m evidently not yet enlightened, so perhaps this is the wrong term to use here, but I’ll stick with it for now.
We could define our own class for this:
class Endofunctor a where
  efmap :: (a -> a) -> a -> a
This is just a degenerate version of Functor, in which two type arguments have become one. This simplification means that an Endofunctor is not required to be a parameterised type, unlike a Functor. As far as I can tell, Haskell does not define any such class itself. I’m not entirely sure why, which leads me to suspect I’m missing something. But as I’ll show, this does appear to lead to a simpler result.
Of course, Haskell can’t auto-generate an implementation of Endofunctor for me, but it’s easy enough to write one for my Bar type. (I’m reverting to the original non-parameterized version, by the way.)
instance Endofunctor Bar where
  efmap f (Leaf i)   = Leaf i
  efmap f (Node l r) = Node (f l) (f r)
And then, instead of Patrick’s topDown and bottomUp (modified to use my Mu instead of his Term):
topDown, bottomUp :: Functor f => (Mu f -> Mu f) -> Mu f -> Mu f
topDown f  = In <<< fmap (topDown f) <<< out <<< f
bottomUp f = out >>> fmap (bottomUP f) >>> In >>> f
we have these much simpler versions that don’t need to bother with the wrapping and unwrapping necessitated by the fixed point type:
bottomUp, topDown :: Endofunctor a => (a -> a) -> a -> a
bottomUp fn = efmap (bottomUp fn) >>> fn
topDown fn  = efmap (topDown fn) <<< fn
As with Patrick’s code, this illustrates the duality between bottom-up and top-down by “reversing the arrows” but with more elegance, I believe.
Likewise, the code that performs the transformation I’m actually interested in is free from all this messy Mu/Term, In/out stuff:
leftBarNode :: Bar -> Bar
leftBarNode (Node l r) = Node (leftBarNode l) (Leaf 0)
leftBarNode other = other
And I no longer need to pepper my tree construction with loads of In functions—I can just construct it directly. Here I’m using that leftBarNode with the bottomUp recursion scheme:
*Main> bottomUp leftBarNode (Node (Node (Leaf 1) (Leaf 2)) (Leaf 3))
Node (Node (Leaf 1) (Leaf 0)) (Leaf 0)
Let’s step back and see where this has taken us.
I have been able to encapsulate recursion schemes in separate functions (topDown and bottomUp) just like in Patrick’s solution, and these are expressed in terms of a type class (Endofunctor, effectively a degenerate form of Functor), enabling each individual data type to define its own structure for traversal purposes. This enables the logic of interest to be separated out from the mechanisms of recursive traversal. It was not necessary to invoke any infinitely nested type magic (no type system Y combinator, no fixed points). This removed all of the associated wrapping and unwrapping clutter, and avoided the cognitive overhead of a recursive data type not being self-evidently recursive. I was able to get away from all that by avoiding the Functor class, which wreaked havoc by being too general for the task at hand.
And that’s why I take issue with Patrick’s conclusion:
“The fact that we can express the duality between top-down and bottom-up traversals merely by ‘reversing the arrows’ that determine our code’s flow, all the while retaining generality and type safety, is nothing short of amazing. That these definitions emerged naturally out of fixed-points and functors, two concepts central to Haskell and to functional programming in general, is doubly amazing.”
The first sentence is true for both Patrick’s and my approach. But I think my code demonstrates that these things do not depend on fixed-points, and while they may depend on endofunctors, they do not depend on functors in the specific guise of Haskell’s Functor type class. On the contrary, fixed points were necessary to work around a problem introduced by the use of Functor and they introduced considerable accidental complexity, as well as reducing the clarity of the data type definition. By avoiding Functor, you no longer need fixed-points, and you can still have all the benefits mentioned in that first sentence.
Not Necessarily an Improvement
All of which is not to say that Patrick’s approach is worse than mine. There’s are two serious problems with my alternative.
The first, and most obvious downside of this is that we lose the support for compiler code generation. By using my own Endofunctor class and its associated efmap, I now have to write the tedious, error-prone traversal code myself. And remember, this is where we came in: one of the principle benefits of the approach Patrick shows was getting the compiler to write this code for us.
There’s also the fact that nothing in the world of Haskell knows about this custom Endofunctor class, unlike the extremely widely supported Functor class. So my solution will not play as nicely with the rest of the Haskell world as Patrick’s.
(Both these problems would go away if something like Endofunctor were a standard part of Haskell, and was supported as a code generation target just like Functor. So it’s tempting to say that the real problem here is Functor, but as a mere dabbler in Haskell, I think that’s a significantly stronger conclusion than I’m qualified to draw.)
So the bottom line is that Patrick’s approach is probably worth the pain. But I believe I have shown that the basic idea of recursion schemes is not in fact dependent on either the Functor class or fixed point types.
So my point is not that Patrick’s way of doing this is wrong. My point is that he oversells Functor and fixed points. Fixed points turn out to be a necessary evil imposed by the (in this case) unwanted generality of Functor. It’s still very clever, though.
When to Stockpile Computer Parts?
This is the end of the golden age for those of us who like to buy computers.
It’s all Apple’s fault. A significant force at the start of the personal computing revolution, Apple is now instrumental in its destruction. Thanks to the path beaten by the iPhone and iPad, the computer industry now understands how to make phones and tablets that do most of the jobs for which individuals used to buy a computer. This development of ‘just barely good enough’ tablets and phones has meant that demand for new PCs is falling drastically.
This has some negative consequences. Those of us who need (or merely want) a proper computer are going to find that it looks increasingly less like a commodity, and more like an exotic piece of specialist kit. In other words: PCs will get much more expensive. (Falling demand leading to higher prices may seem to contradict some conventional economic ideas, but this is an industry that relies heavily on economies of scale.) This will come as a nasty shock after several decades of decreasing prices and increasing performance.
And just in case it’s not obvious, ‘PC’ includes Macs here. Around a decade has passed since Apple last created Macs with truly original technical designs. The economic logic of building around commodity PC components was inescapable. In 2006 I bought two new laptops, one Mac and one PC, and out of curiosity, I did a little investigation. I enumerated all of the internal components making up each system. The Mac looked much fancier on the outside, but its innards turned out to be very nearly identical to my Dell’s. Apple instead specialised in areas where they could still charge a premium: physical design, the usability of their software, and things that aren’t PCs. Their profits illustrate the wisdom of this strategy.
The fact that Macs use commodity PC components (albeit mounted on Apple-designed circuit boards in beautiful boxes) means that the collapse of the PC market will raise Mac prices too.
Price hikes for personal computers of all kinds are inevitable because it just won’t be economically viable for parts suppliers to produce the necessary components at the scale that has historically enabled them to become so cheap.
It’s Happening Now
If you’re wondering how soon this will be upon us, be aware that Intel has recently decided not to complete a massive new chip factory despite having done most of the building work. Weak demand means that even though they’ve put a lot of money into this site, it’s just not worth the remaining investment it would take to bring the plant online.
If you were thinking of buying or building a new computer in the next couple of years, that factory may well be where its most important components would have been built. But not now.
It’s Not Happening All at Once
In some ways, the change will seem gradual. For one thing, PC components have a surprisingly long life, because today’s high-end parts often become tomorrow’s cheap bits. Designs remain on the market in various guises for much longer than you might guess from the inflated rhetoric about how fast things move in the computing industry. But if you build your own systems, you will probably see it sooner rather than later.
Some things will remain cheap for a good while. Anything needed in either a phone or a tablet will continue to be worth manufacturing in high volume. For example, graphics processors just capable enough to drive a full-size tablet panel with retina resolution will be a mass market component for a long time yet. And there’s not going to be any shortage of cheap ARM-based system-on-a-chip components either. This suggests that laptops will be affordable for a good while, because there will be a cheap way to make them: bolt a keyboard to a tablet. (Although quite what will happen to Intel’s venerable processor architecture in this new world remains to be seen.)
The downside is that over time, it will become very expensive, or even impossible to buy a laptop whose performance is much better than a tablet. And given the average tablet’s performance, that’s not an encouraging prospect.
Server components will probably be less affected. The increasing move of computing power out of the hands of users and into the cloud means that the anti-PC trend won’t have an adverse effect in the world of the server any time soon.
The first problems will hit those of us who like desktop systems, not least because the unique merits of desktop computers are not all that widely understood. If you’re in the know you can, for now, get a substantially better system if you don’t mind it being tied to a desk and cumbersome to move around. The desktop’s advantages can be particularly acute if you build them yourself.
I built a new desktop about a year ago. It replaced a system I built about 4.5 years earlier, which still outperforms a lot of newer computers I’ve had the misfortune to use. If you build your own system, you can build it to last—by choosing carefully, you can create something which, with the odd minor upgrade, will be serviceable for years. But you do that by picking components that are fairly close to the bleeding edge. And that’s where we’re going to see costs rise first.
To be more accurate, what we will probably see is costs failing to come down. There has always been a hefty premium for the very best components at any time, so I tend to pick CPUs and motherboards that are a notch down from the top of the range. This saves hundreds of dollars, with only a very slight reduction in capability. I’m expecting, sadly, that this early adopter premium will become significantly stickier. Soon, saving a couple of hundred will drop you not just a few months behind the curve, but an entire year or more.
At Least Computers Stopped Getting Faster
About the only positive aspect of all this is that we no longer need to upgrade quite so often. For all that futurologists love to talk about Moore’s law, the fact is that performance improvements have very nearly ground to a halt, compared to 15 years ago. Yes, Moore’s law is still in play, but that doesn’t mean much in practice: CPU transistor counts double every couple of years, but this brings relatively small performance improvements.
Moore’s law was never the main force behind the exponential performance improvements we used to enjoy. The two phenomena were merely correlated for years. In practice the improvements came almost entirely from exponential increases in transistor switching speeds. The correlation was down to a common root cause: shrinking transistors. Each new generation of silicon fabrication technology made transistors smaller. This enabled more to fit on a chip (fulfilling Moore’s law) but it also had the happy side effect of letting them work faster. But round about 2003/2004, for various reasons these size reductions stopped producing speed increases. They still enabled Moore’s law to hold, but this has simply demonstrated that Moore’s law wasn’t the main thing delivering ever faster computers. (To be fair, Moore’s law came in handy back in the good times: it enabled us to build in the caches that helped to exploit the speed improvements. Without Moore’s law it would have been harder to make practical use of the increased processing power. So you need both phenomena to drive up performance; Moore’s law on its own doesn’t do it.)
Strictly speaking, Moore’s law is providing more power, but not in a form that provides much of a speed boost in practice, for most applications. The power comes in multi-core CPUs, offering parallel processing capabilities of the kind that was once the preserve of exotic, specialized systems. But a quick glance at the 8 CPU load meters on my computer’s task manager when it’s busy shows me that the vast majority of tasks have no use for this parallelism. Only certain specialized tasks can do anything useful with this particular kind of power, something we’ve known since 1967. Amdahl’s law predicts this problem, and most computing tasks look more like the line at the bottom of the first graph in that page than the one at the top.
Apparently the press hasn’t noticed that the exponential performance improvements which are supposed to be ushering in a ‘singularity’ petered out about a decade ago. Even within the computing industry, an embarrassing number of people have also failed to spot this fundamental fact.
All of this may not exactly sound like a positive—it means computer upgrades are no longer as exciting as they used to be, which in turn is a significant factor behind the collapse in demand that’s causing the whole problem in the first place. We’re learning to make do with less, and the smartphone and tablet revolution is part of that. But it’s also why it’s now entirely possible to make a desktop PC that will be useful for 5 years. (And of course, I realise that by taking advantage of this, I’m part of the problem.)
The extended useful life of a computer means component failure is now a major factor in the need to replace equipment. Two decades ago, computer components may as well have been immortal, because (except for hard drives) they usually became obsolete years before they stopped working. And this brings me onto the question behind this post: should I start stockpiling computer equipment?
The Last Affordable Motherboard
We have a vicious circle. Slowing performance improvements (and, soon, rising prices) will push down demand. This reduces opportunities for economies of scale, so prices will rise. Manufacturers will have less incentive to spend billions pursuing ever more elusive performance gains, so improvements will not only become more expensive, they will be increasingly slight. Add ‘good enough’ tablets and phones to the mix, and all you’re left with is increasingly infrequent computer purchases by software developers and other geeks like me. By that time, computers will be as expensive as any other highly specialized technical equipment.
You know that fully-loaded Mac Pro (the new one that looks like evil R2D2 or a high-tech dustbin) that seems so absurdly expensive? Get used to it—5-digit price tags are the future (although the industrial design is probably all downhill from here).
This suggests that there’s going to come a point where it makes sense to buy enough motherboards and other basic components to last a lifetime before the prices get too high. If the only thing I had to worry about was age-related failures, I could reasonably afford to buy all the motherboards and assorted components I’ll ever need. (I’m assuming here that failure is connected to hours of use rather than total elapsed age, and that a component that has sat on the shelf for 20 years is as good as new. Most electronic failures tend to be physical in nature, caused either by heat cycles or, in the case of moving parts—fans and non-SSD drives—plain old wear and tear. And the relatively short lifetime of SSDs is also directly related to how much you use them, rather than how much time has passed. So excellent shelf life seems like a reasonable assumption, but I can’t prove it of course.)
The only problem with this is that components are still getting better—progress has slowed but it hasn’t stopped entirely. If I had bought 10 motherboards 5 years ago, I’d be annoyed, because things have moved on enough that I really don’t want a computer built around something of that era. But the useful lifetime does keep going up, so sooner or later I’ll buy a brand new motherboard that’s not very much worse than the very best one I’ll ever be able to buy.
I don’t think we’re there yet, and I’m not quite sure when that time will come. I’d like to believe the time to start stockpiling is a good 10 years away. But then in 2003 I naively thought that we probably had a good 10 years of exponential clock-speed-driven performance increase yet to come, when in fact it was already pretty much game over. So I suspect that 10 years is optimistic.
The hour is later than you think.